The main goal in creating slides for cytologic assessment is to make smears that are thin and evenly distributed, yet without rupturing the cells.
It is best to create multiple slides from one fine-needle aspirate (FNA), enabling the clinician to stain one with an in-house stain (DiffQuick®) for sample assessment while allowing for unstained slides to be sent to the cytology laboratory for a Wright’s based stain and potentially other special stains. Additionally, making multiple slides from one sample creates the thin slides that are desired.
The key to getting a thin, even sample is to start with a very small sample to smear. This small amount of tissue can be put on the slides in one of two ways. In either method, the sample should be expelled onto the slide with the needle bevel pointing down towards the slide, and the bevel over the slide near the frosted edge to give the most room for smearing.
One Way
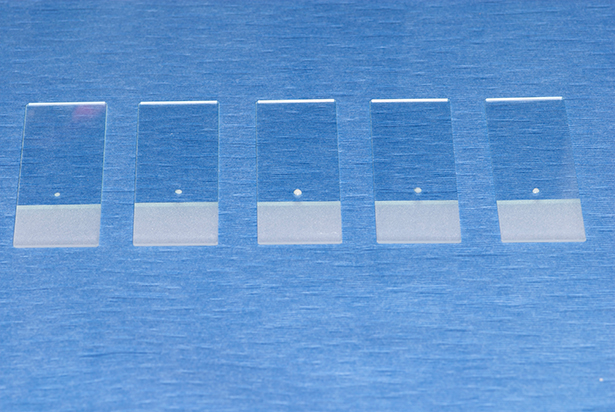
The first technique involves gently and carefully expelling a very little amount of sample onto as many slides as possible (most FNAs will yield enough for 4 to 6 slides; see Figure 1).
Next, another empty, or “smearing” slide is used to smear each small sample across each slide. The same smearing slide can be used to smear every slide from one sampling procedure. A new smearing slide must be used for every new sample to avoid transfer of cells from the smearing slide to a sample slide from a different site.
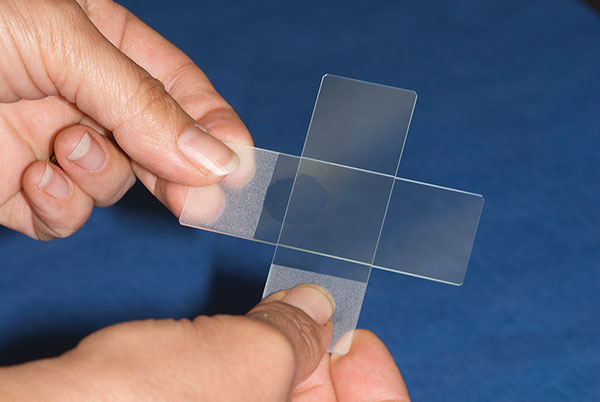
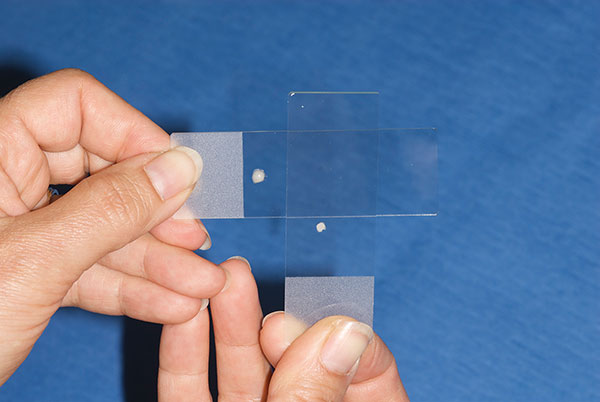
To create a thin, even, and unruptured sample, the smearing slide is placed crosswise to the sample slide on the tissue sample and gently pressed down to flatten the sample (Figure 2). Keeping the slides touching via the same gentle pressure, the smearing slide is pulled to the end of the sample slide and off.
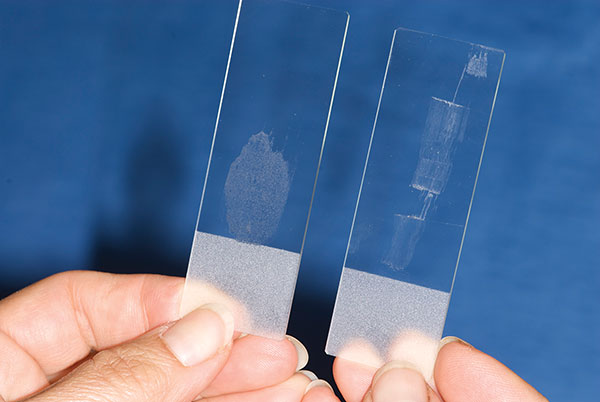
If the slides stay flat against each other, the sample will be smooth and even. If one of the smearing slide edges touches the sample slide with disproportionate pressure, the sample will get dragged and will have ruptured areas and areas that are too thick (Figure 3).
Another Way
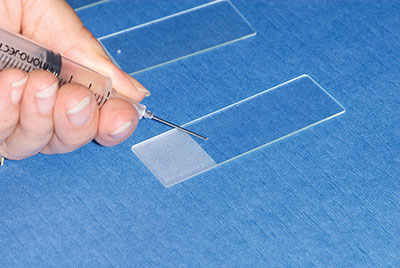
The second technique, and the author’s preferred one, for making smears is to expel all of the sample onto one slide. From there, the smearing slide is used to lightly touch the top of the sample drop, pick up a small amount of sample, then smear that sample via the aforementioned technique across a new slide (Figure 4).
The smearing slide then picks up another small bit of sample to smear on a new slide. This goes on until only a very little bit of sample is left on the first slide, which is then smeared itself.
While this sounds confusing, it is actually a rapid and effective technique. The dominant hand holds the smearing slide the entire time. The non-dominant hand first picks up the initial sample slide for the smearing slide to pick up a small amount of sample. Then the non-dominant hand puts down the sample slide and picks up an empty slide for the transfer and smearing. The non-dominant hand thus goes back and forth between lifting the sample slide and the new empty slide in this method.
Finally, Check Your Sample
The last step in this process is to stain one slide and scan it under the microscope to verify that it is adequate for laboratory submission. Then, send off the unstained slides and await your results!
By Laura Garrett, DVM, DACVIM (Oncology)
Excerpted from Dr. Garrett’s article in the June 2010 NAVC Clinicians Brief. (Online at: cliniciansbrief.com/article/fine-needle-aspiration.)