
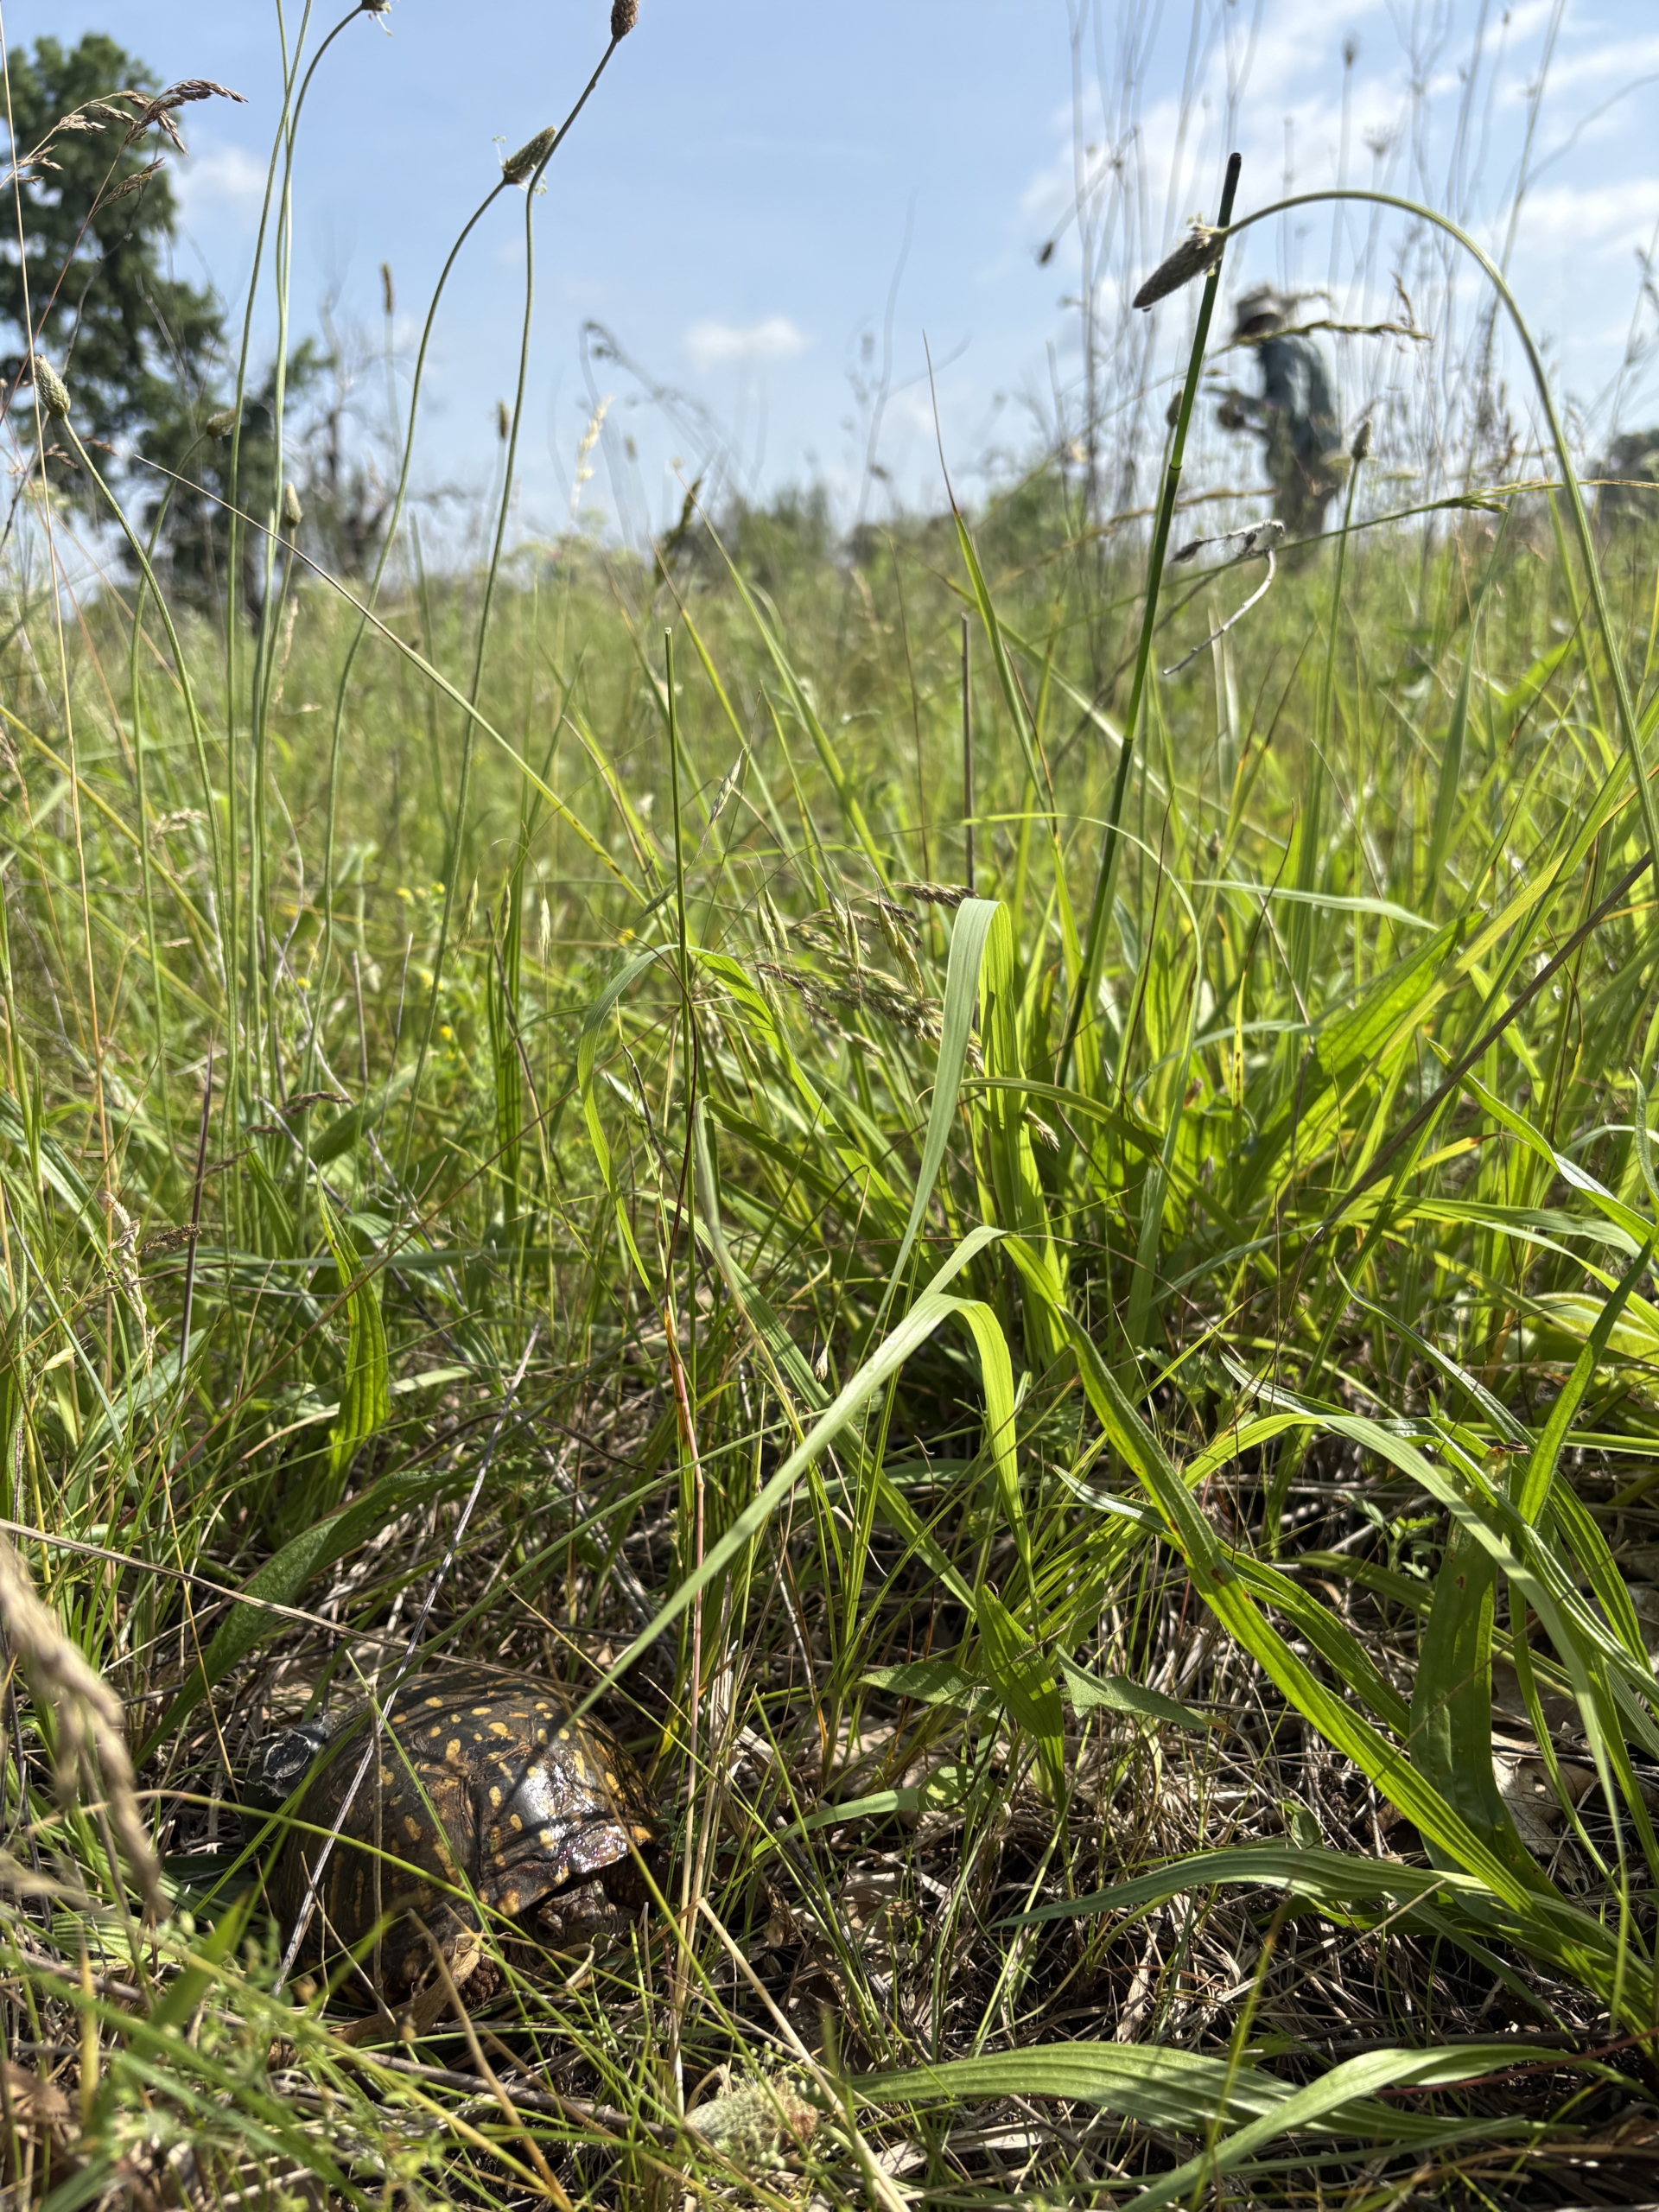
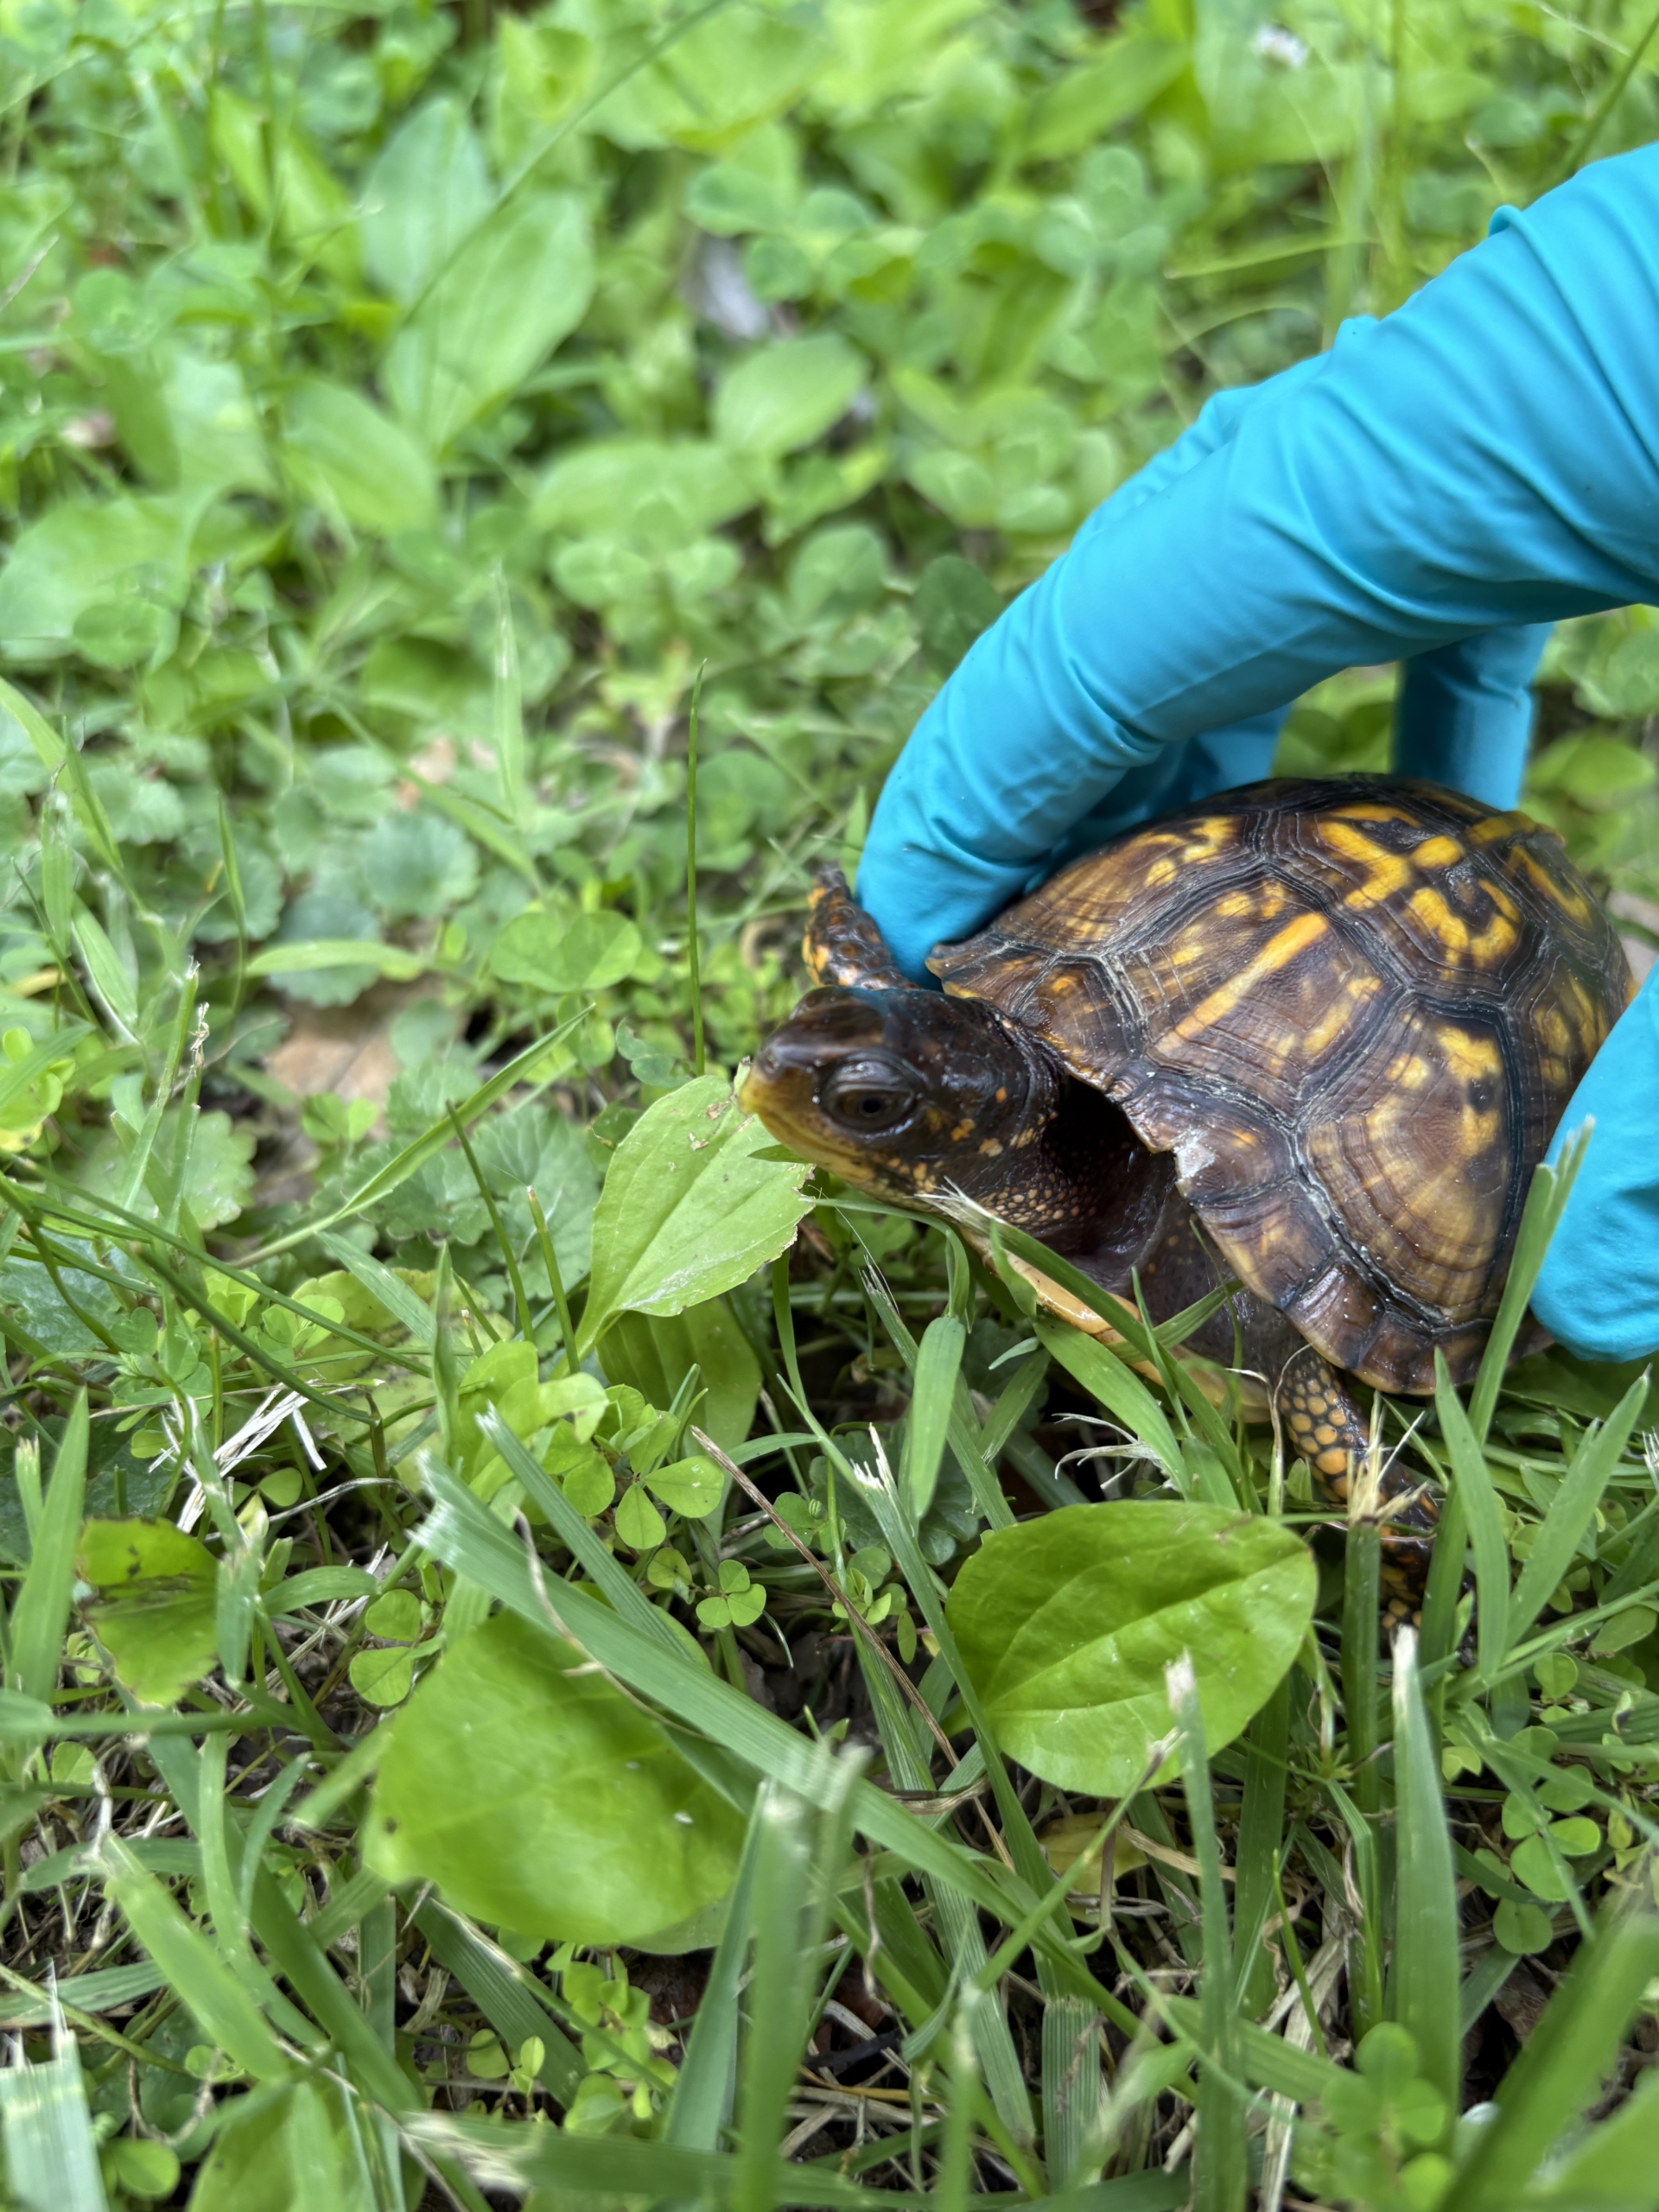
Finding a wild box turtle is always exciting.
After hours of hiking through forests and prairies spotting that familiar domed shell tucked beneath vegetation never gets old. But while finding the turtle may be the highlight of the day, it’s actually just the beginning of the story.
Once a turtle is located, our field team begins a comprehensive health assessment, or “workup,” designed to collect valuable information about the turtle, its environment, and the population it belongs to. Every measurement, sample, and observation contributes to a larger picture of turtle health, conservation, and disease ecology.
So what exactly happens after we find a box turtle?
Let’s follow one turtle through a typical field workup.
Step 1: Documenting the Environment
Before we even touch the turtle, we begin collecting information about its surroundings.
Using GPS units and environmental monitoring equipment, we record the turtle’s location, air temperature, humidity, and the exact time of capture. These data provide important context for understanding the conditions the turtle was experiencing when it was found.
Environmental factors can influence everything from turtle movement patterns to disease transmission. By recording these variables for every turtle, we can look for trends across habitats, seasons, and years.
Think of it as creating a snapshot of the turtle’s world at that exact moment.
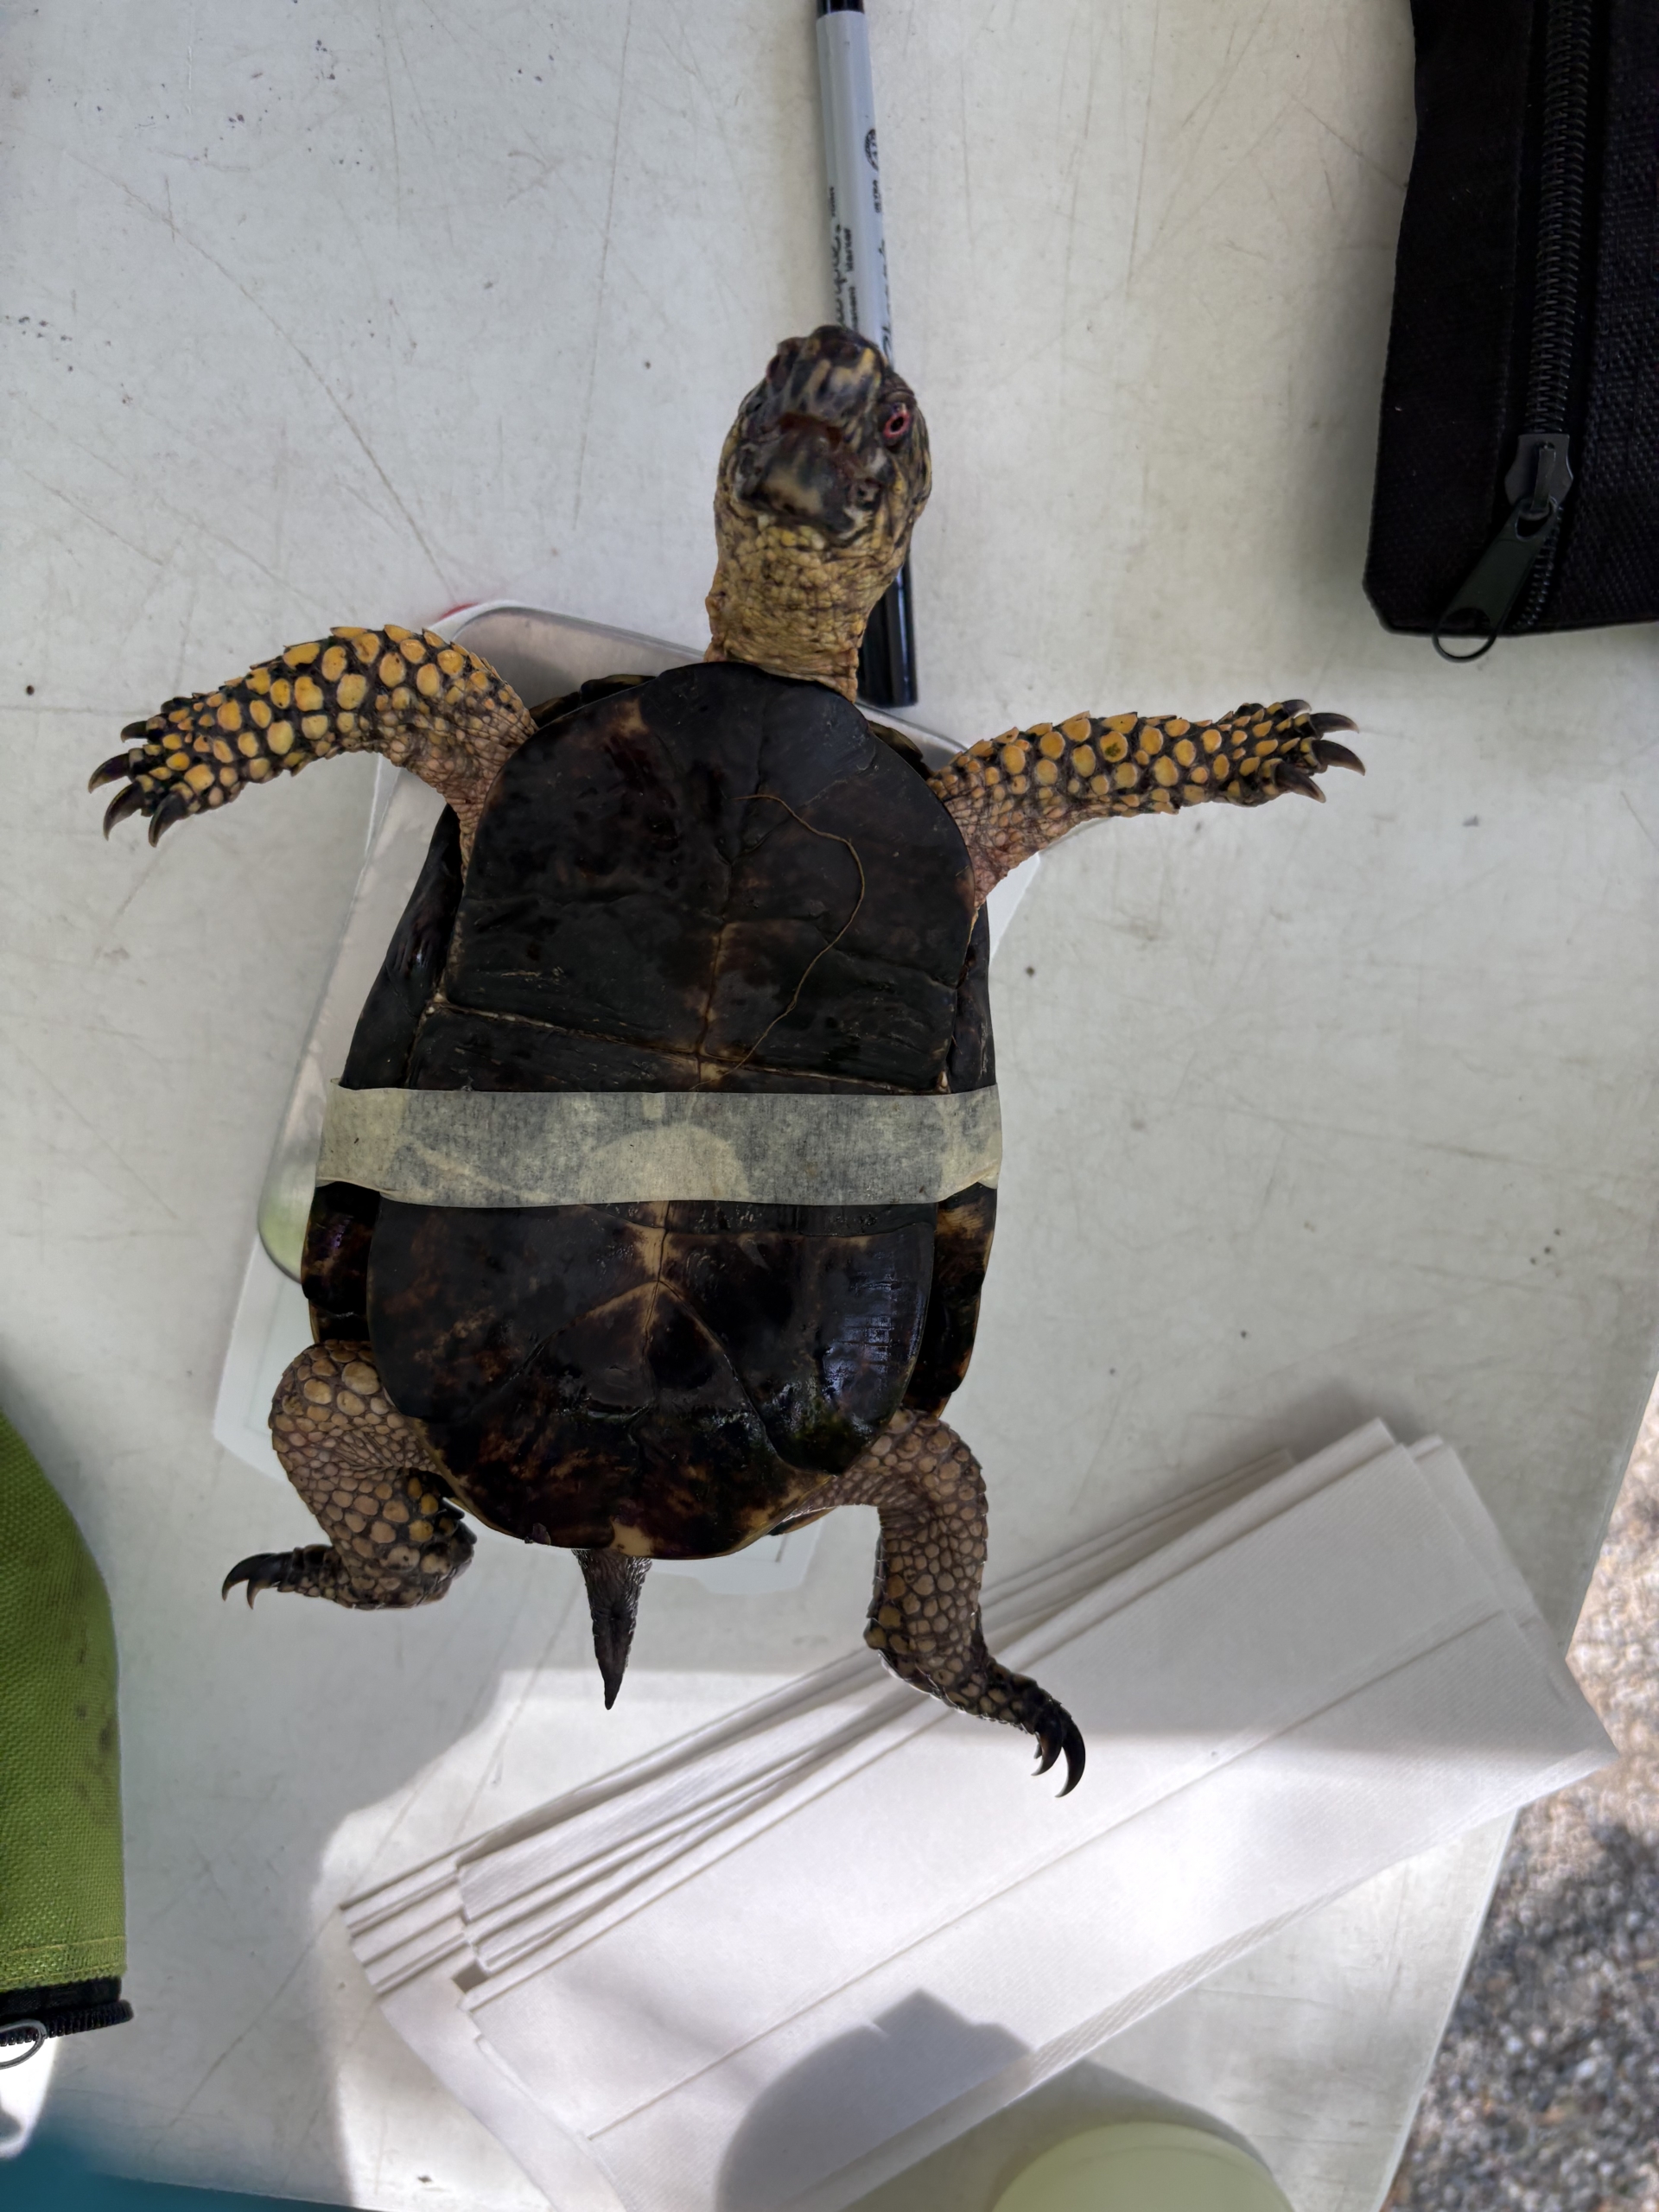
Step 2: How Much Does a Box Turtle Weigh?
Next, we place the turtle on a scale to obtain its body weight.
While this may seem simple, weight is one of the most useful measurements we collect. A turtle’s body mass can provide insight into its overall condition, nutritional status, reproductive status, and long-term health.
When turtles are recaptured in future years, changes in body weight can help us identify growth patterns and monitor how individuals are responding to environmental changes over time.
Step 3: Have We Met Before?
One of the first questions we ask is whether this turtle is a new capture or a familiar face.
Many long-term turtle studies use a shell-notching system in which small notches are carefully placed along the marginal scutes of the shell. The location and combination of these notches create a unique identification code for each turtle.
By checking for notches, we can determine whether the turtle has been captured previously.
Recaptured turtles are scientific gold.
Following the same individual over multiple years allows researchers to study survival, growth, movement, disease exposure, and population trends in ways that simply aren’t possible from a single observation.
Some turtles in long-term studies have been encountered for decades.
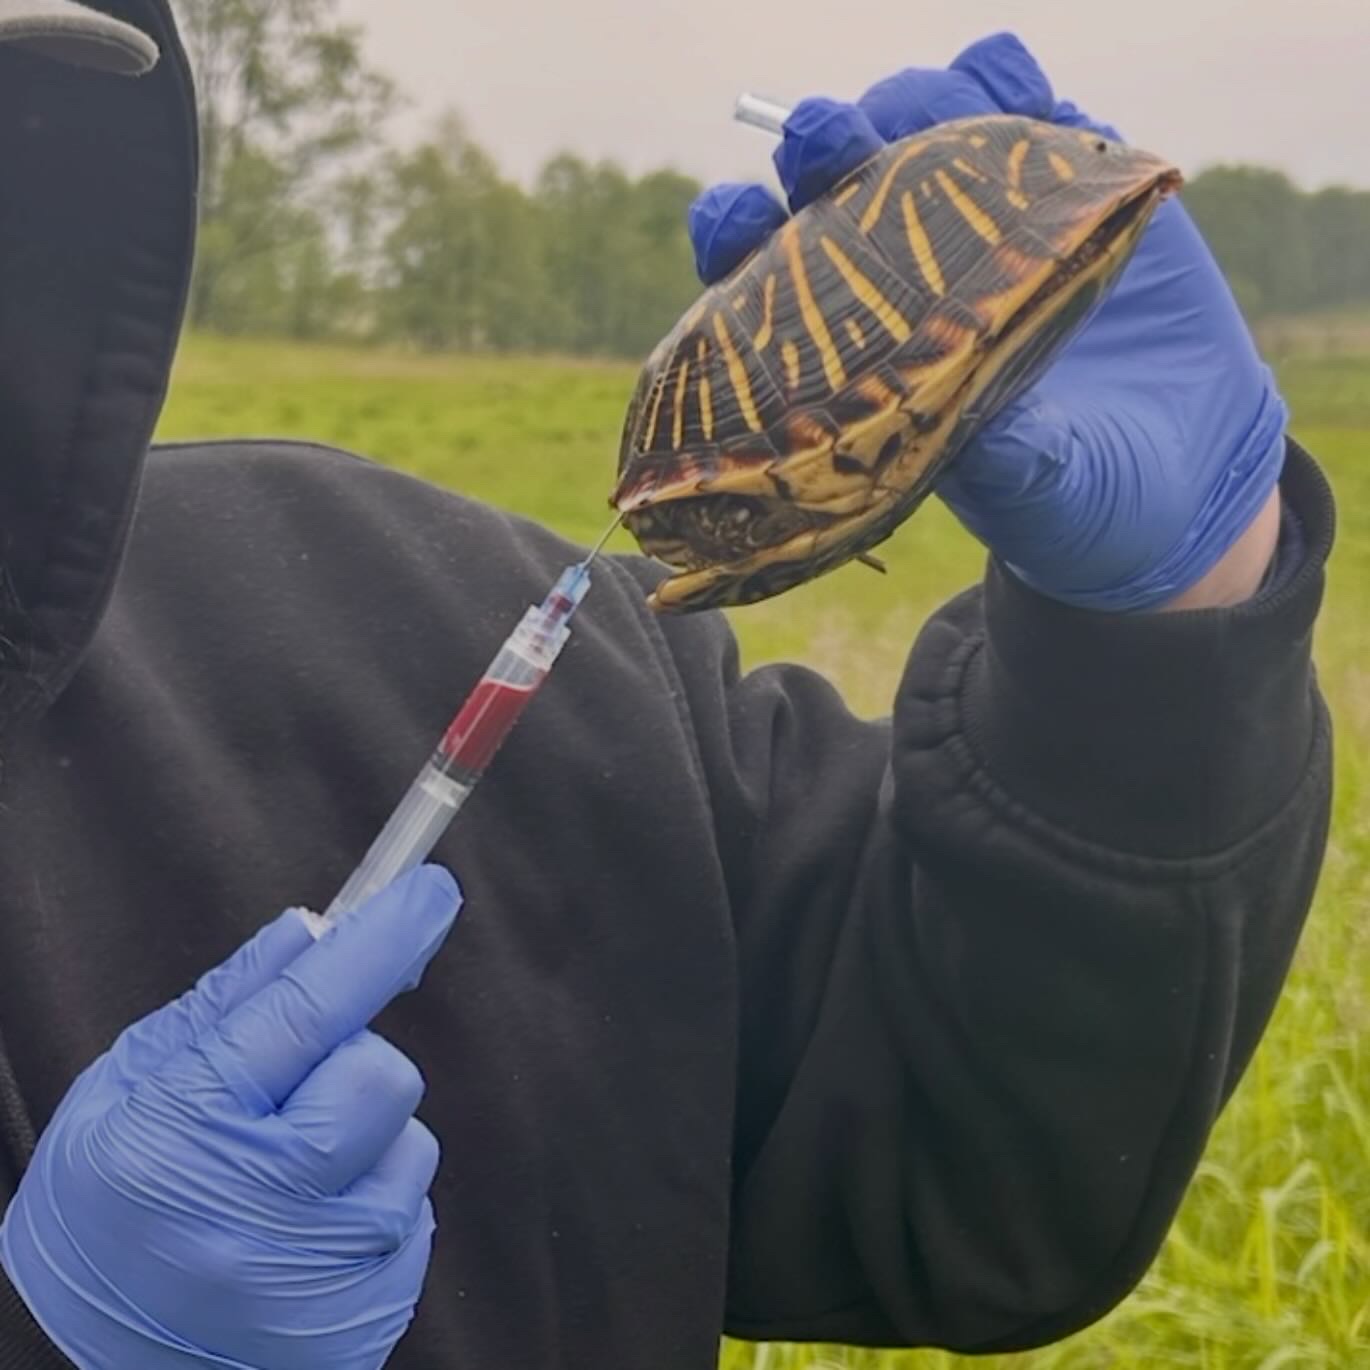
Step 4: Collecting a Blood Sample
Now it’s time for one of the most important parts of the workup.
A small blood sample is collected from the subcarapacial sinus, a venipuncture site located just beneath the shell near the neck. The procedure is performed by trained personnel and provides an incredible amount of information about the turtle’s health.
Back in the laboratory, blood samples can be used to perform complete blood counts (CBCs), plasma chemistry analyses, and other diagnostic tests.
These results help us evaluate immune function, hydration status, organ health, nutritional condition, and potential disease processes.
A few milliliters of blood can reveal a remarkable amount about a turtle’s life.
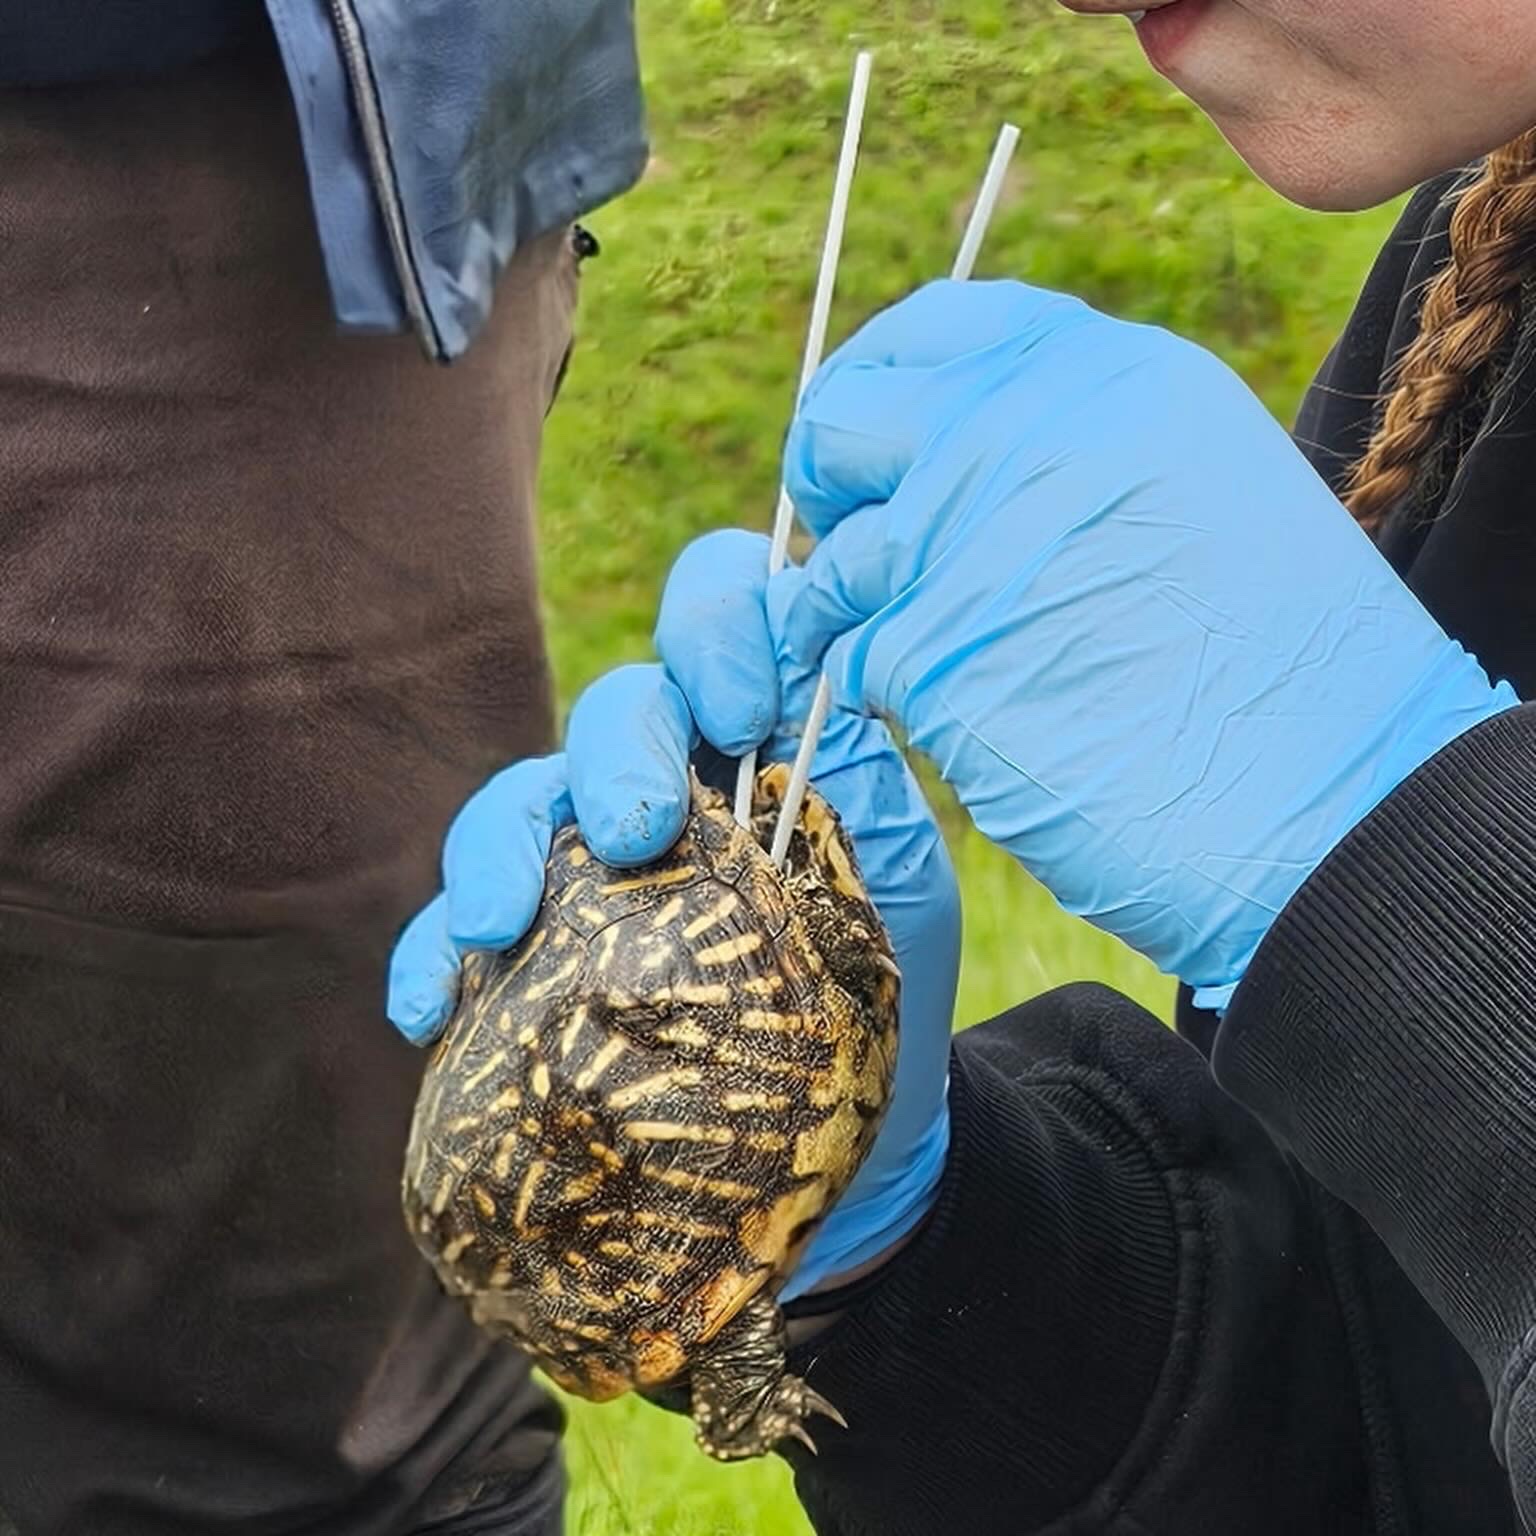
Step 5: Swabbing for Wildlife Disease
Next, we collect oral, cloacal, and shell swabs (see our last blog post for more information!!)
These samples may look simple, but they play a critical role in wildlife disease research. The swabs can be tested for pathogens that affect turtle populations, helping researchers understand where diseases occur and how they spread.
Monitoring disease in wildlife populations is an important component of conservation biology. Early detection of emerging health threats allows researchers and wildlife managers to make informed decisions that help protect vulnerable species.
The real detective work begins once these samples reach the laboratory.
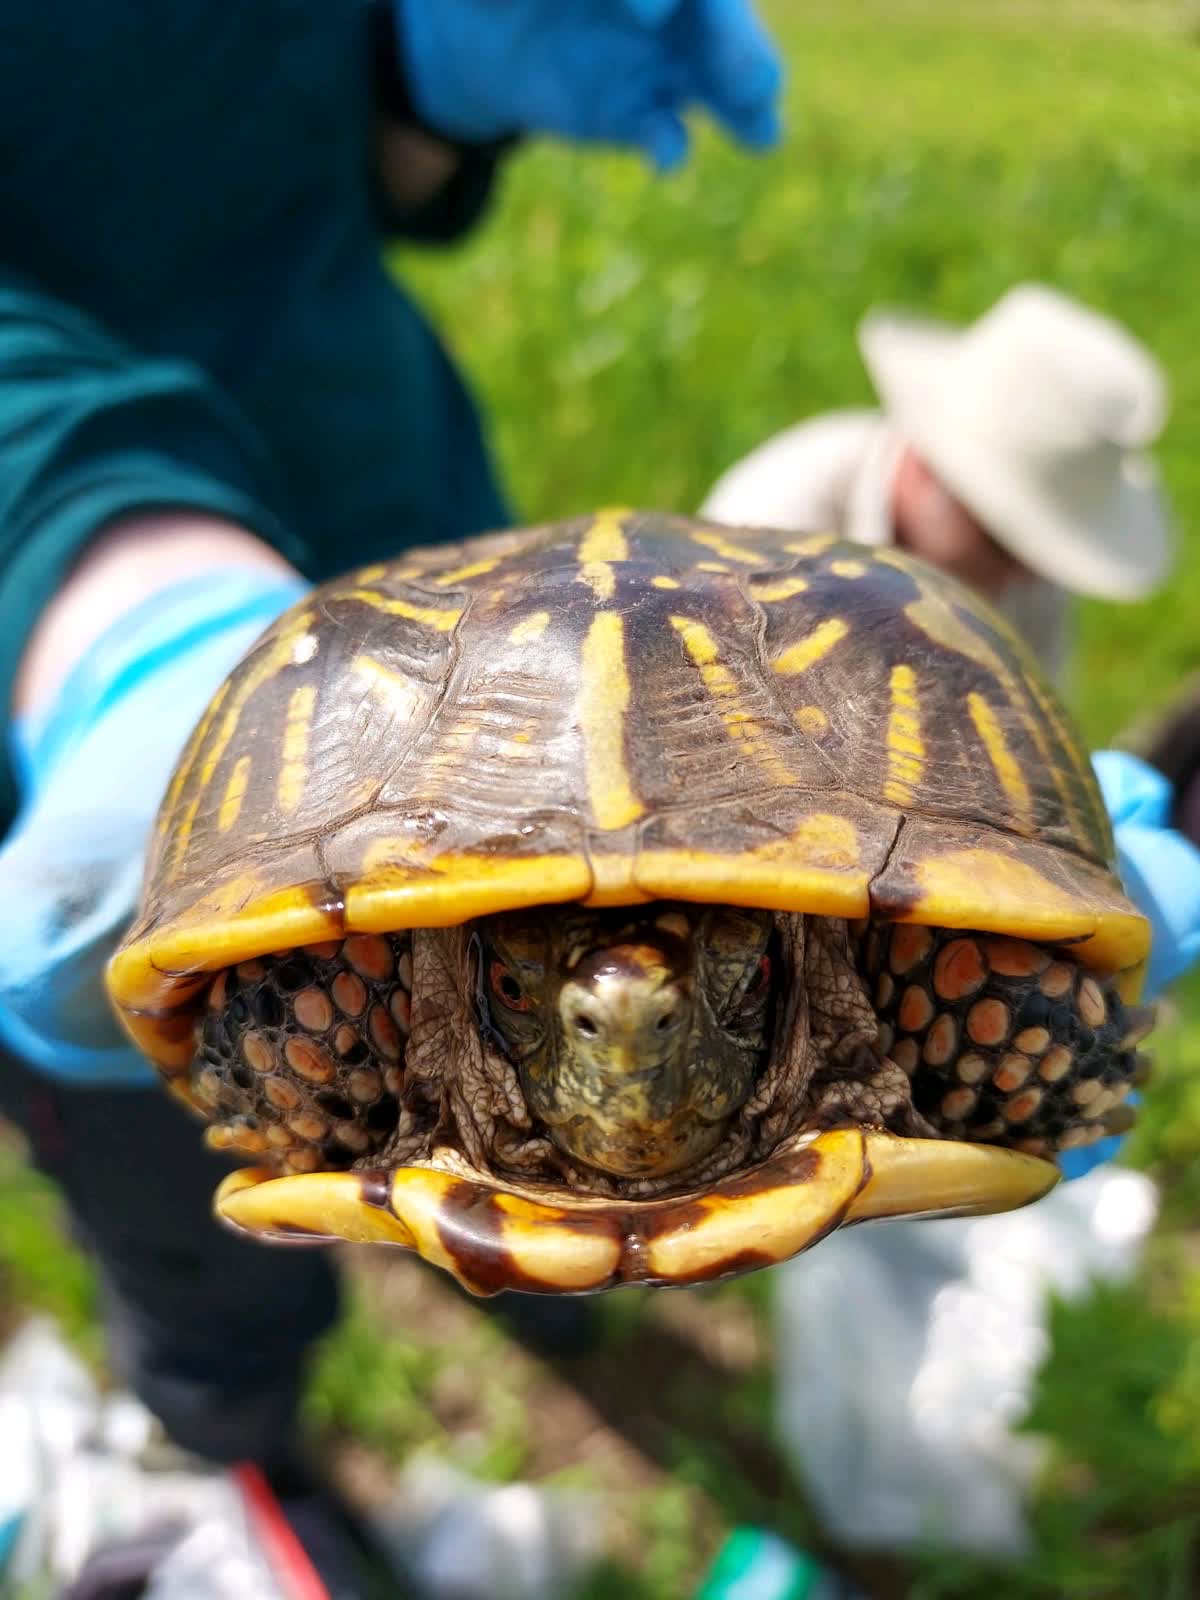
Step 6: A Full Physical Exam
Just like patients at a veterinary clinic, turtles receive a complete physical examination.
Researchers evaluate shell integrity, eyes, nares, oral cavity, skin, and overall appearance. We look for injuries, abnormalities, signs of infection, shell damage, parasites, and anything else that may provide clues about the turtle’s health.
Some findings are obvious.
Others require a trained eye.
Either way, every observation adds another piece to the puzzle.
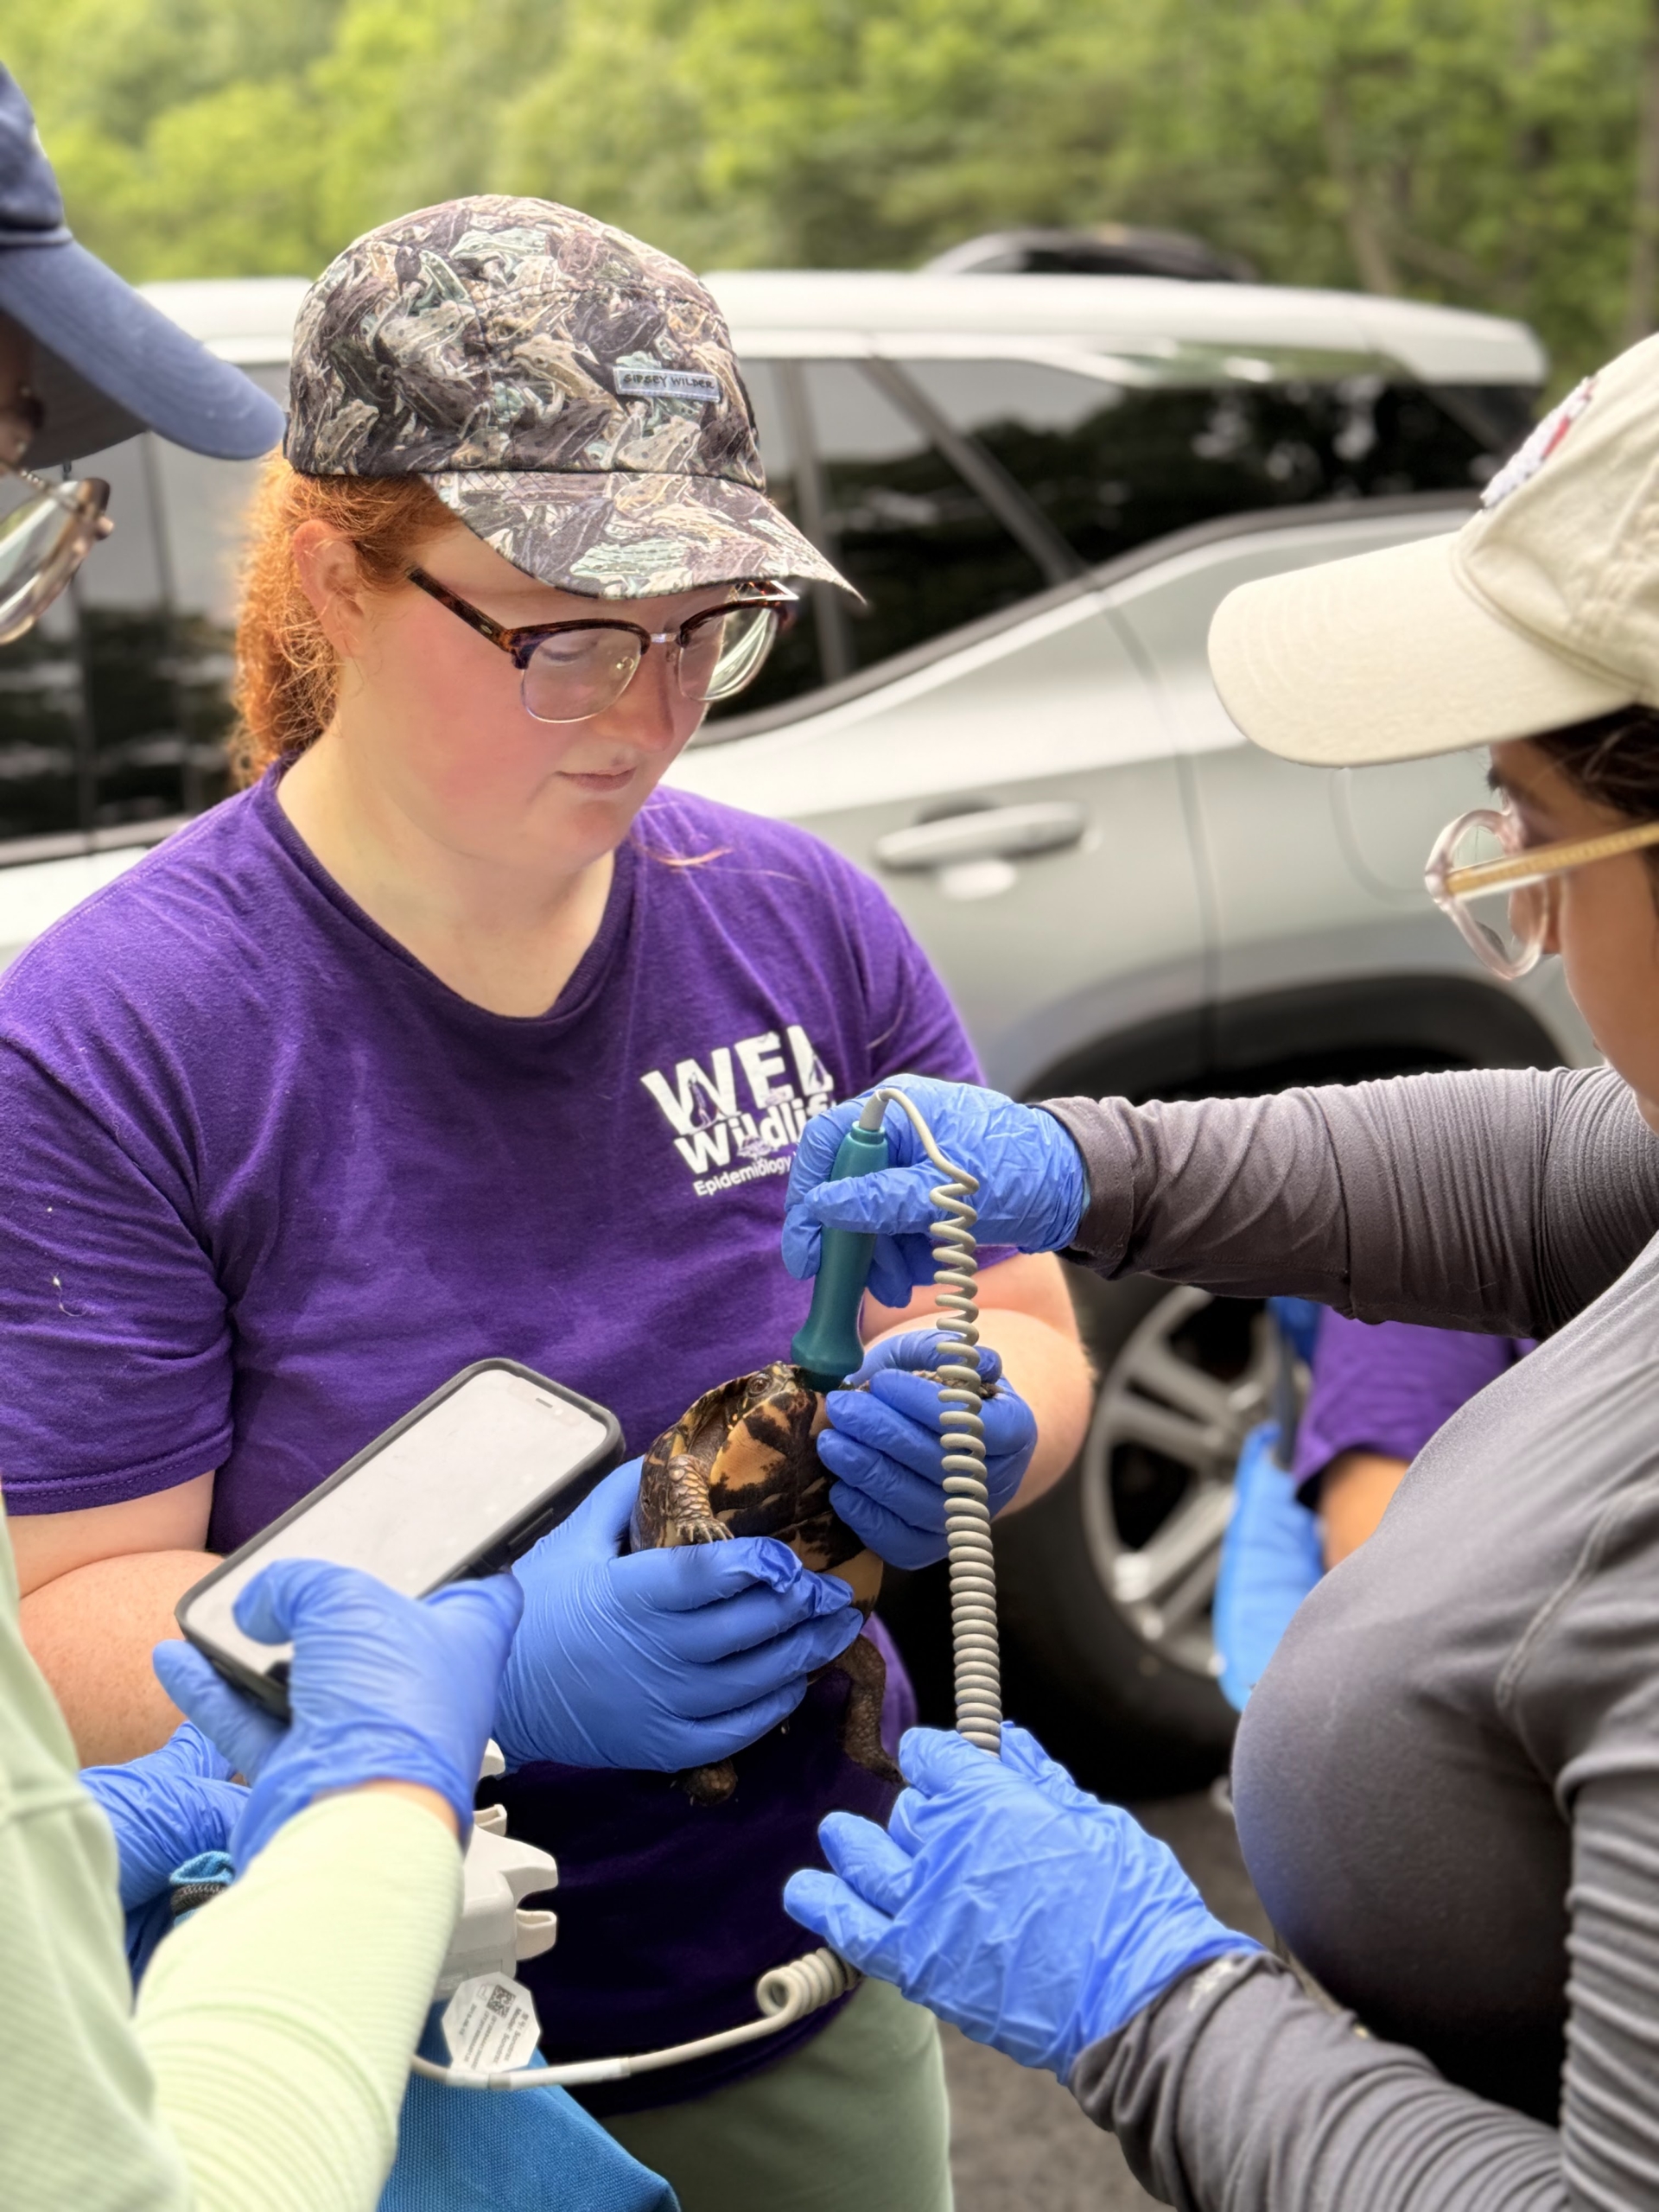
Step 7: Listening to a Turtle’s Heartbeat
One of the coolest moments during a workup involves a Doppler ultrasound unit.
By placing the probe near the shoulder region, we can listen to blood flow and determine the turtle’s heart rate.
Yes, turtles have heartbeats that we can actually hear in the field.
Heart rate serves as another important physiological measurement and can provide insight into overall health and stress levels. Combined with blood work and physical examination findings, it helps us develop a more complete understanding of the turtle’s condition.
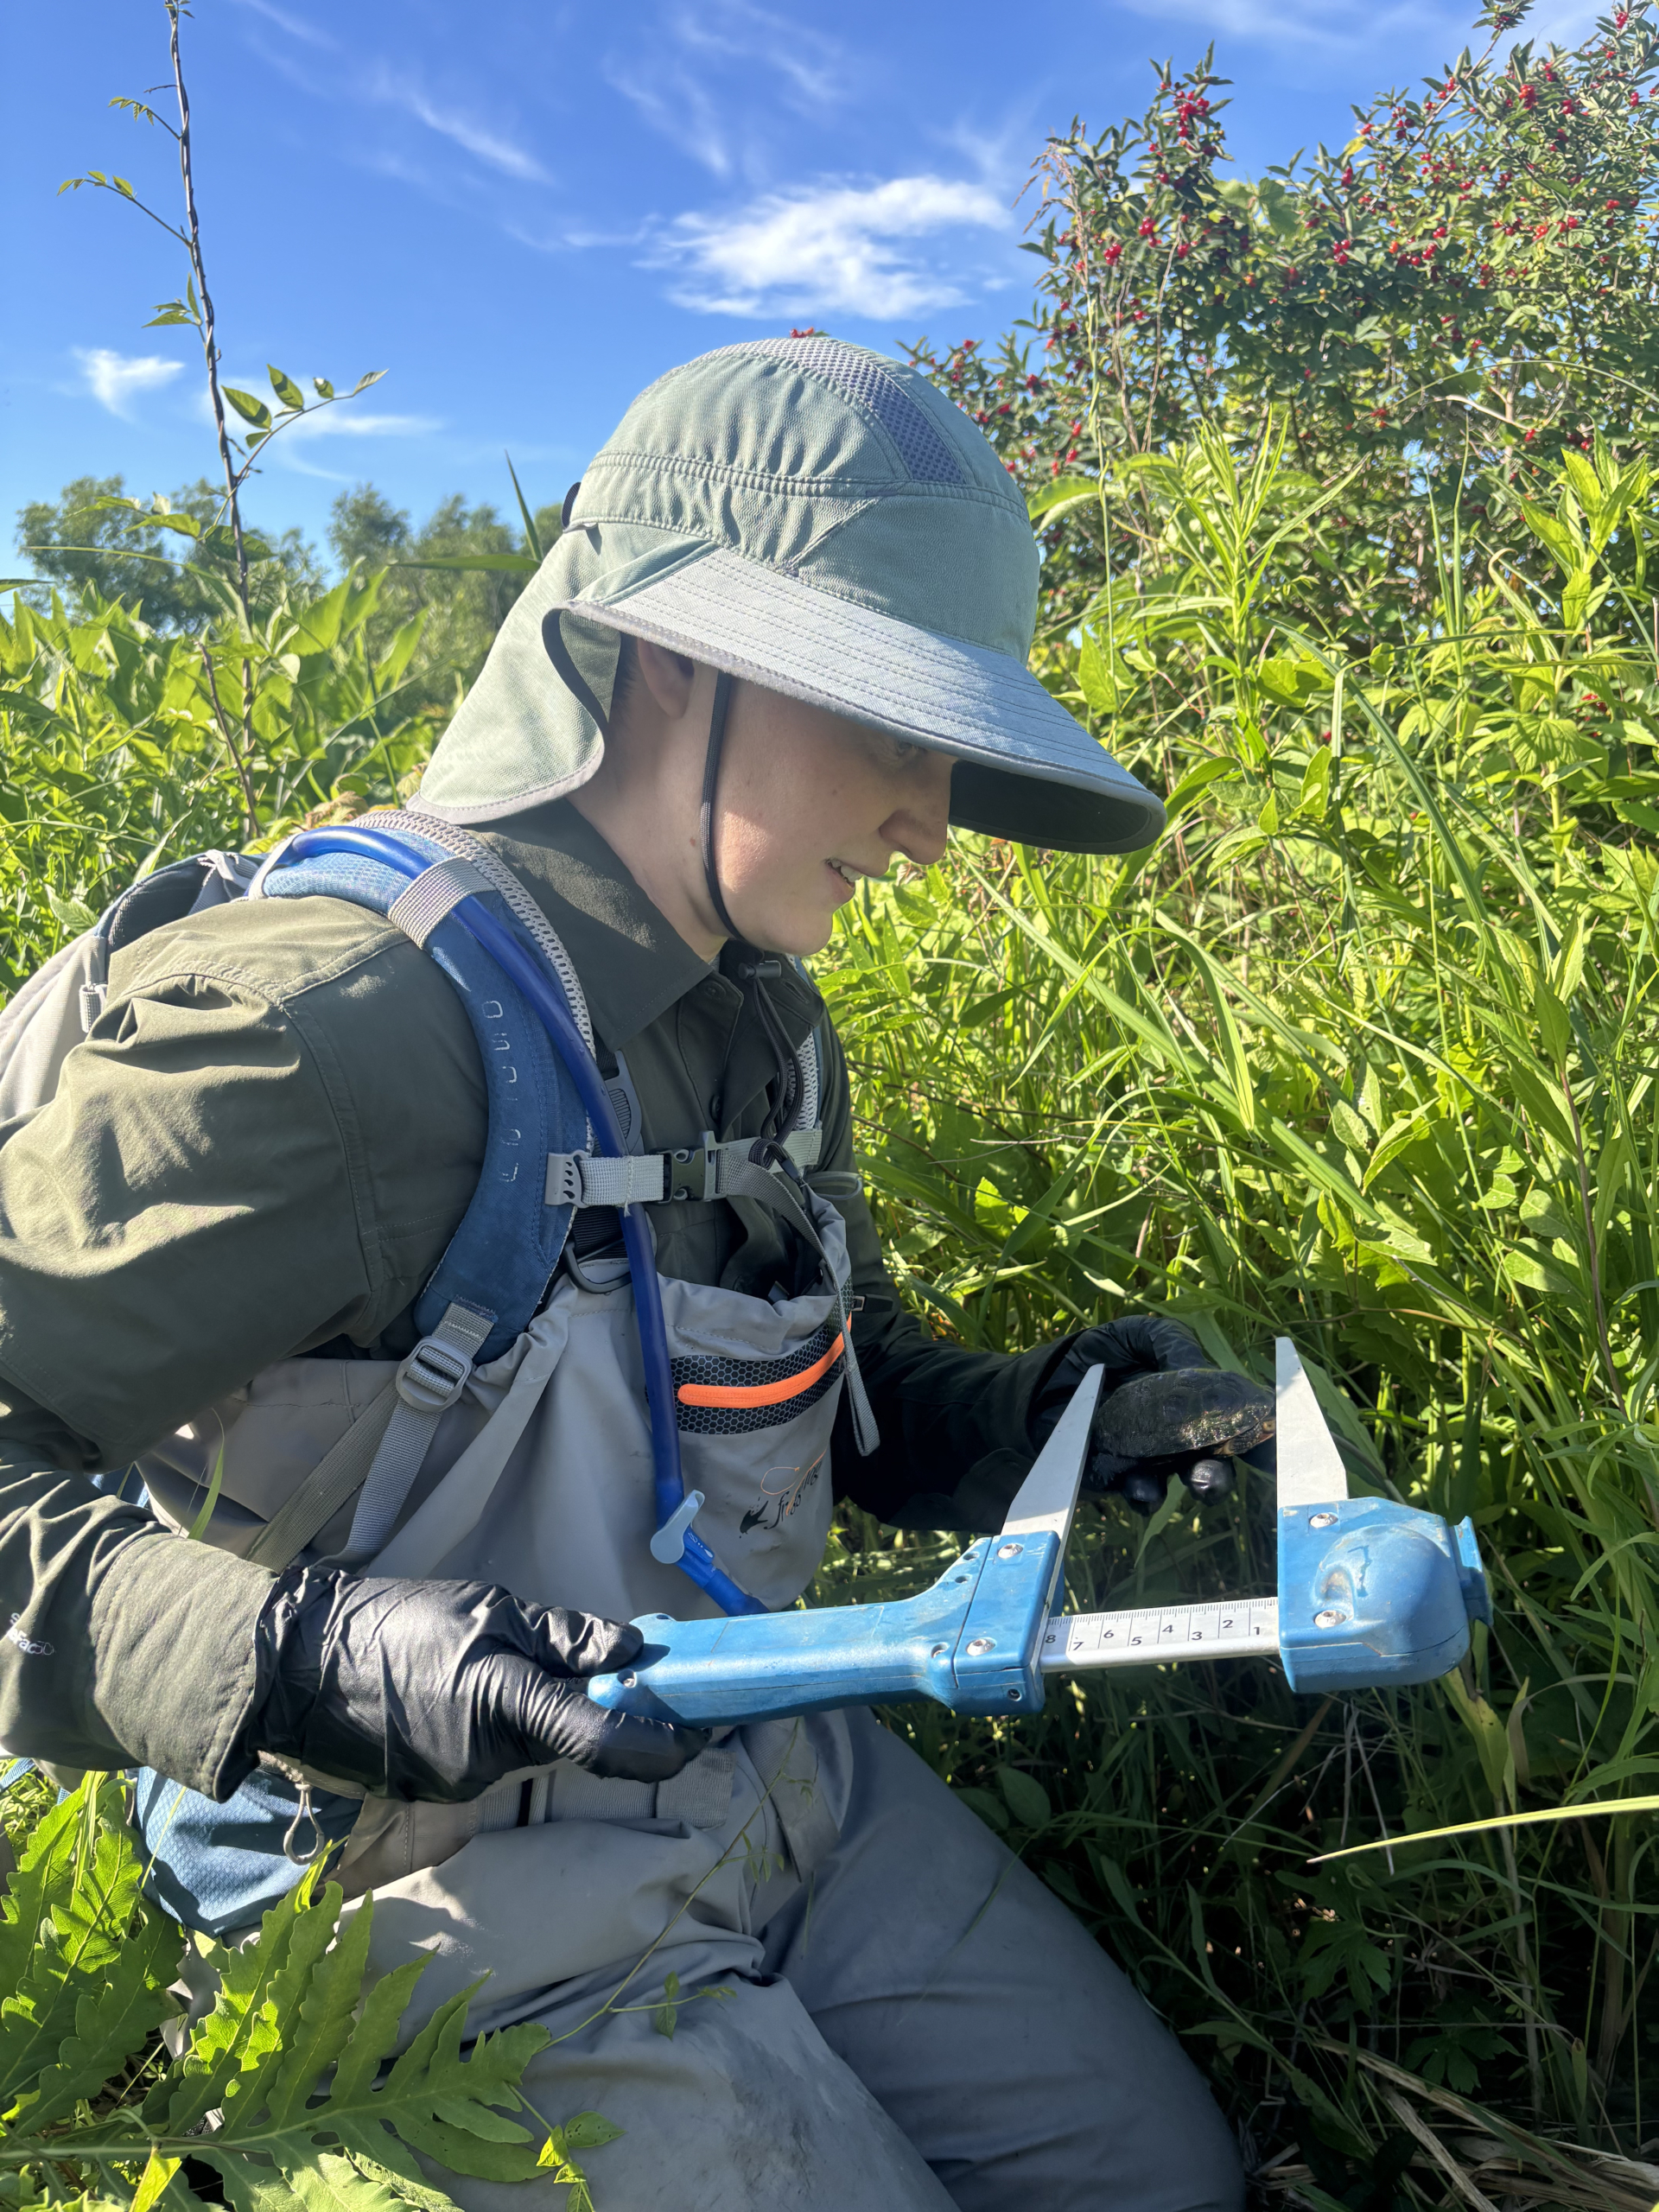
Step 8: Measuring the Turtle
Now it’s time for morphometrics.
Researchers collect a series of demographic measurements including shell length, shell width, and shell height. These standardized measurements allow scientists to compare turtles across different populations and study sites.
When combined with age, sex, weight, and recapture history, these measurements help us understand population structure, growth rates, and long-term demographic trends.
Every measurement contributes to the bigger conservation picture.
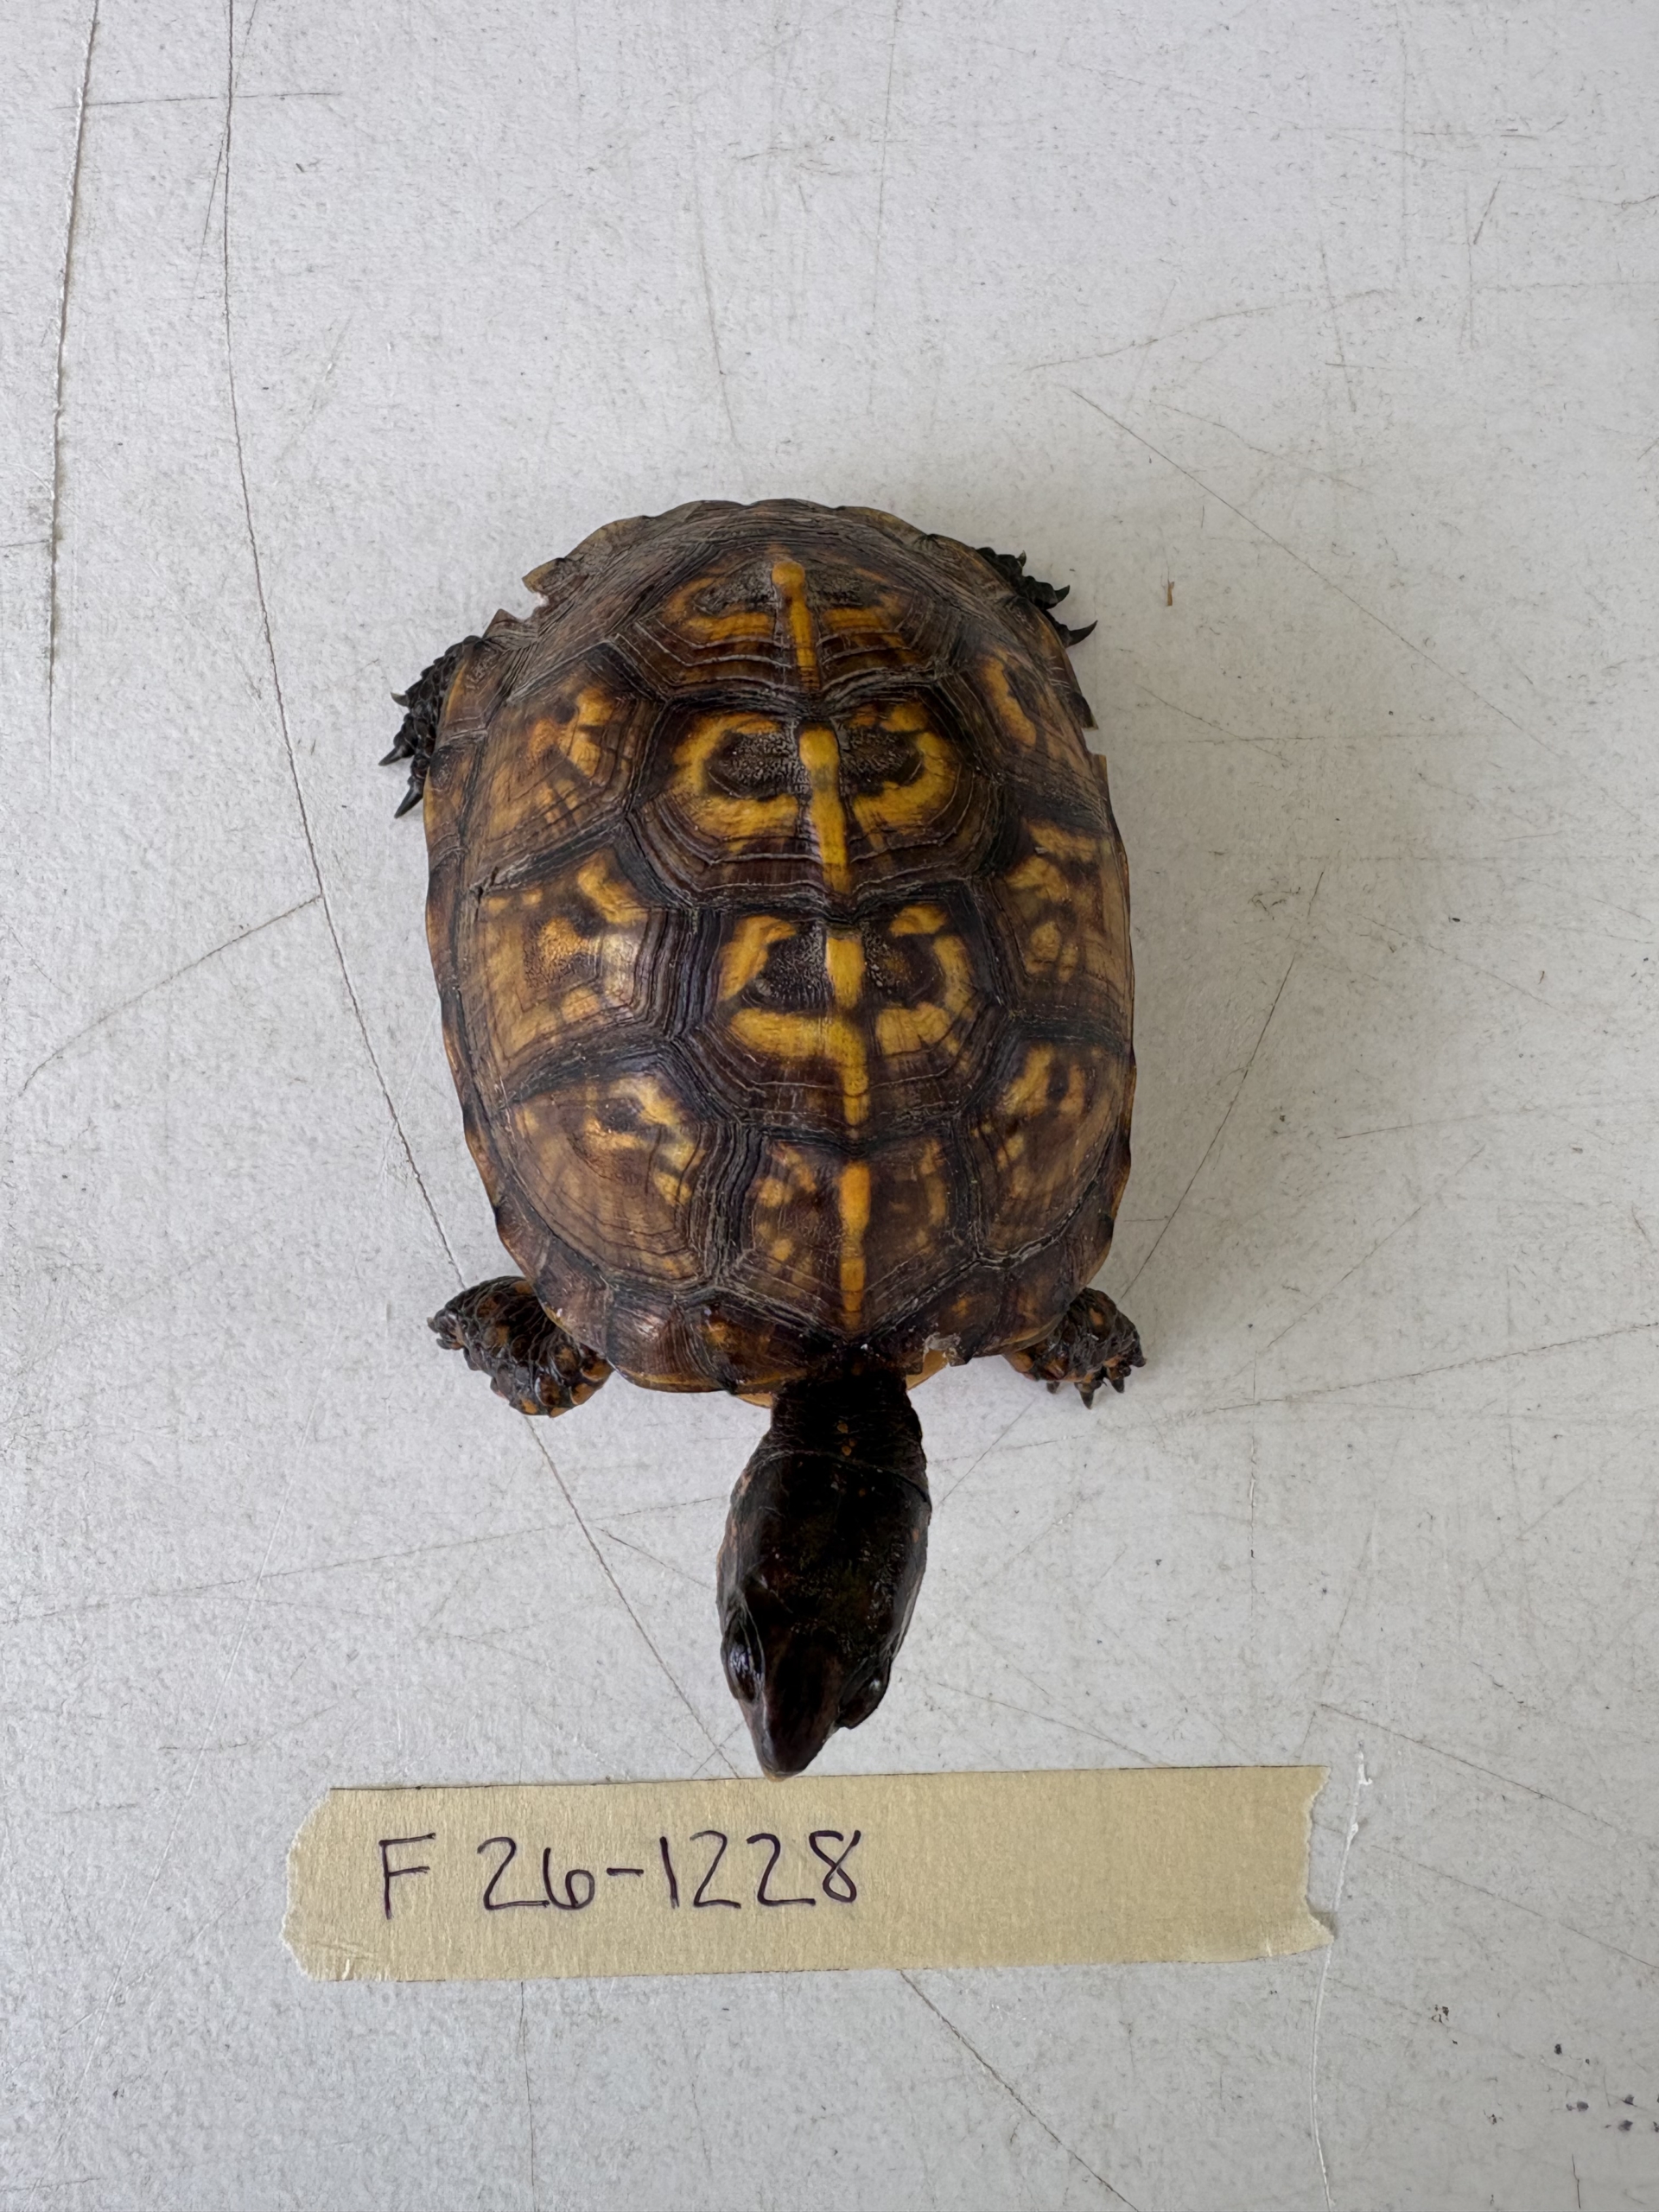
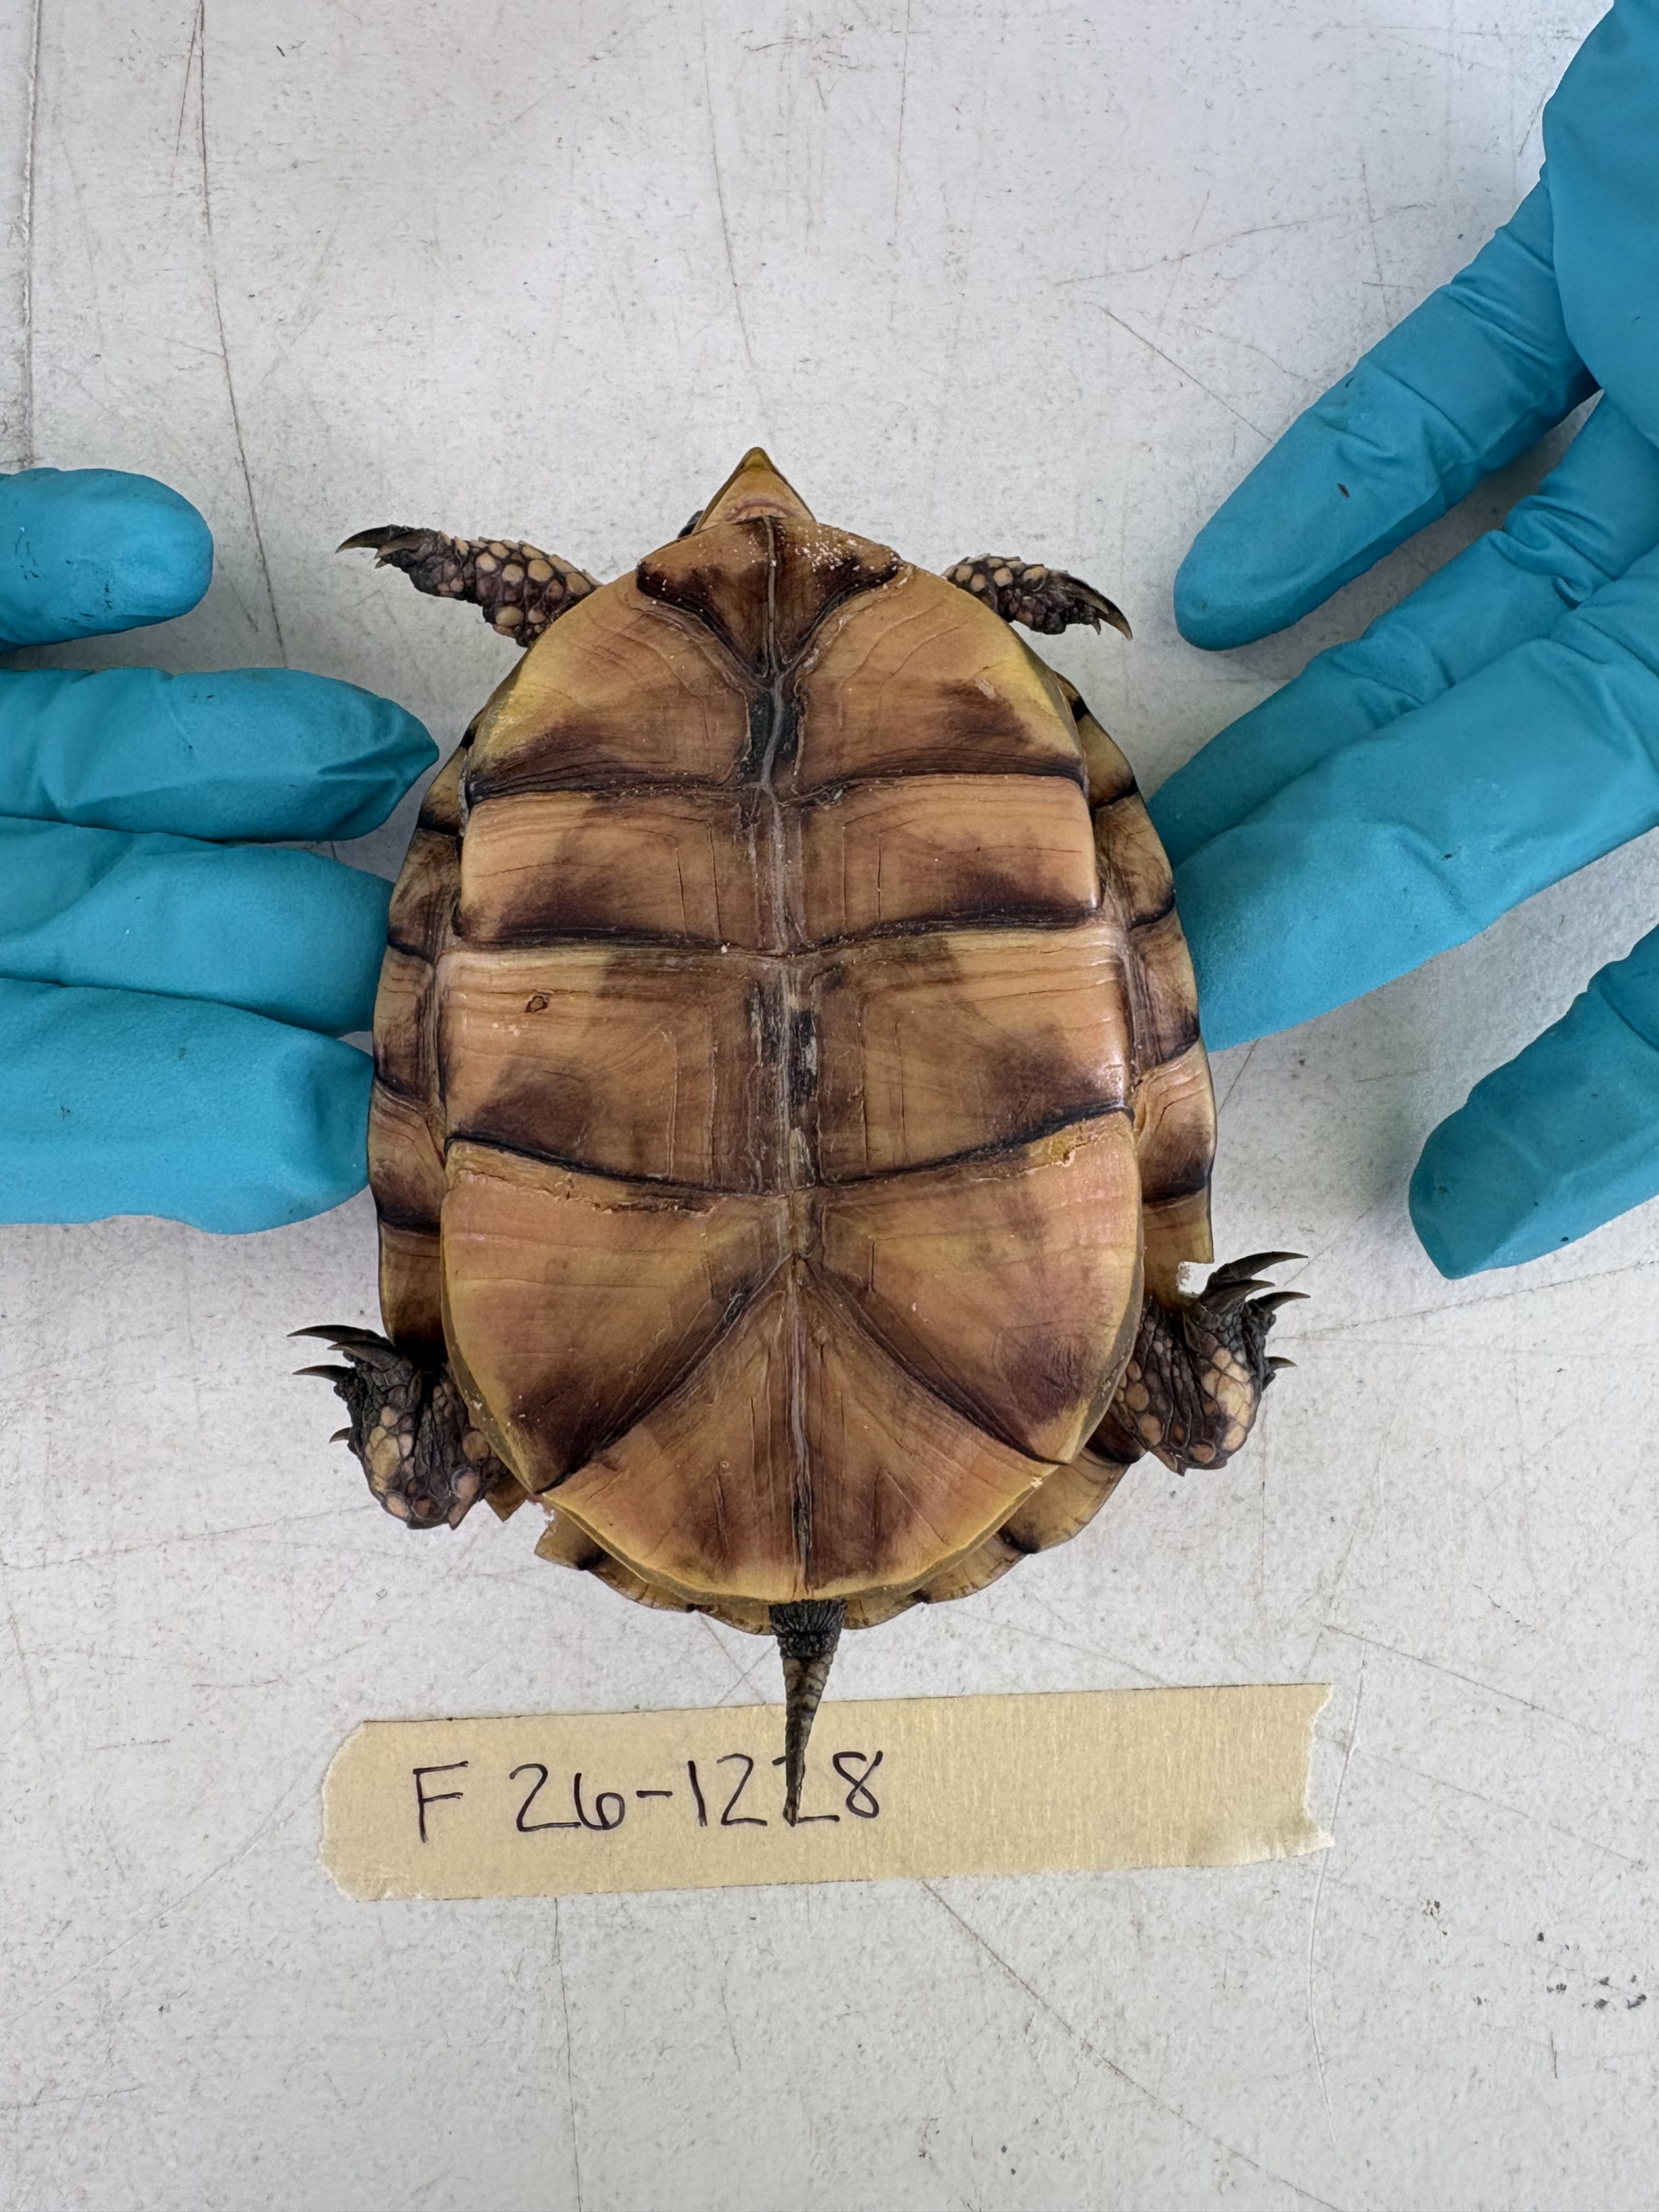
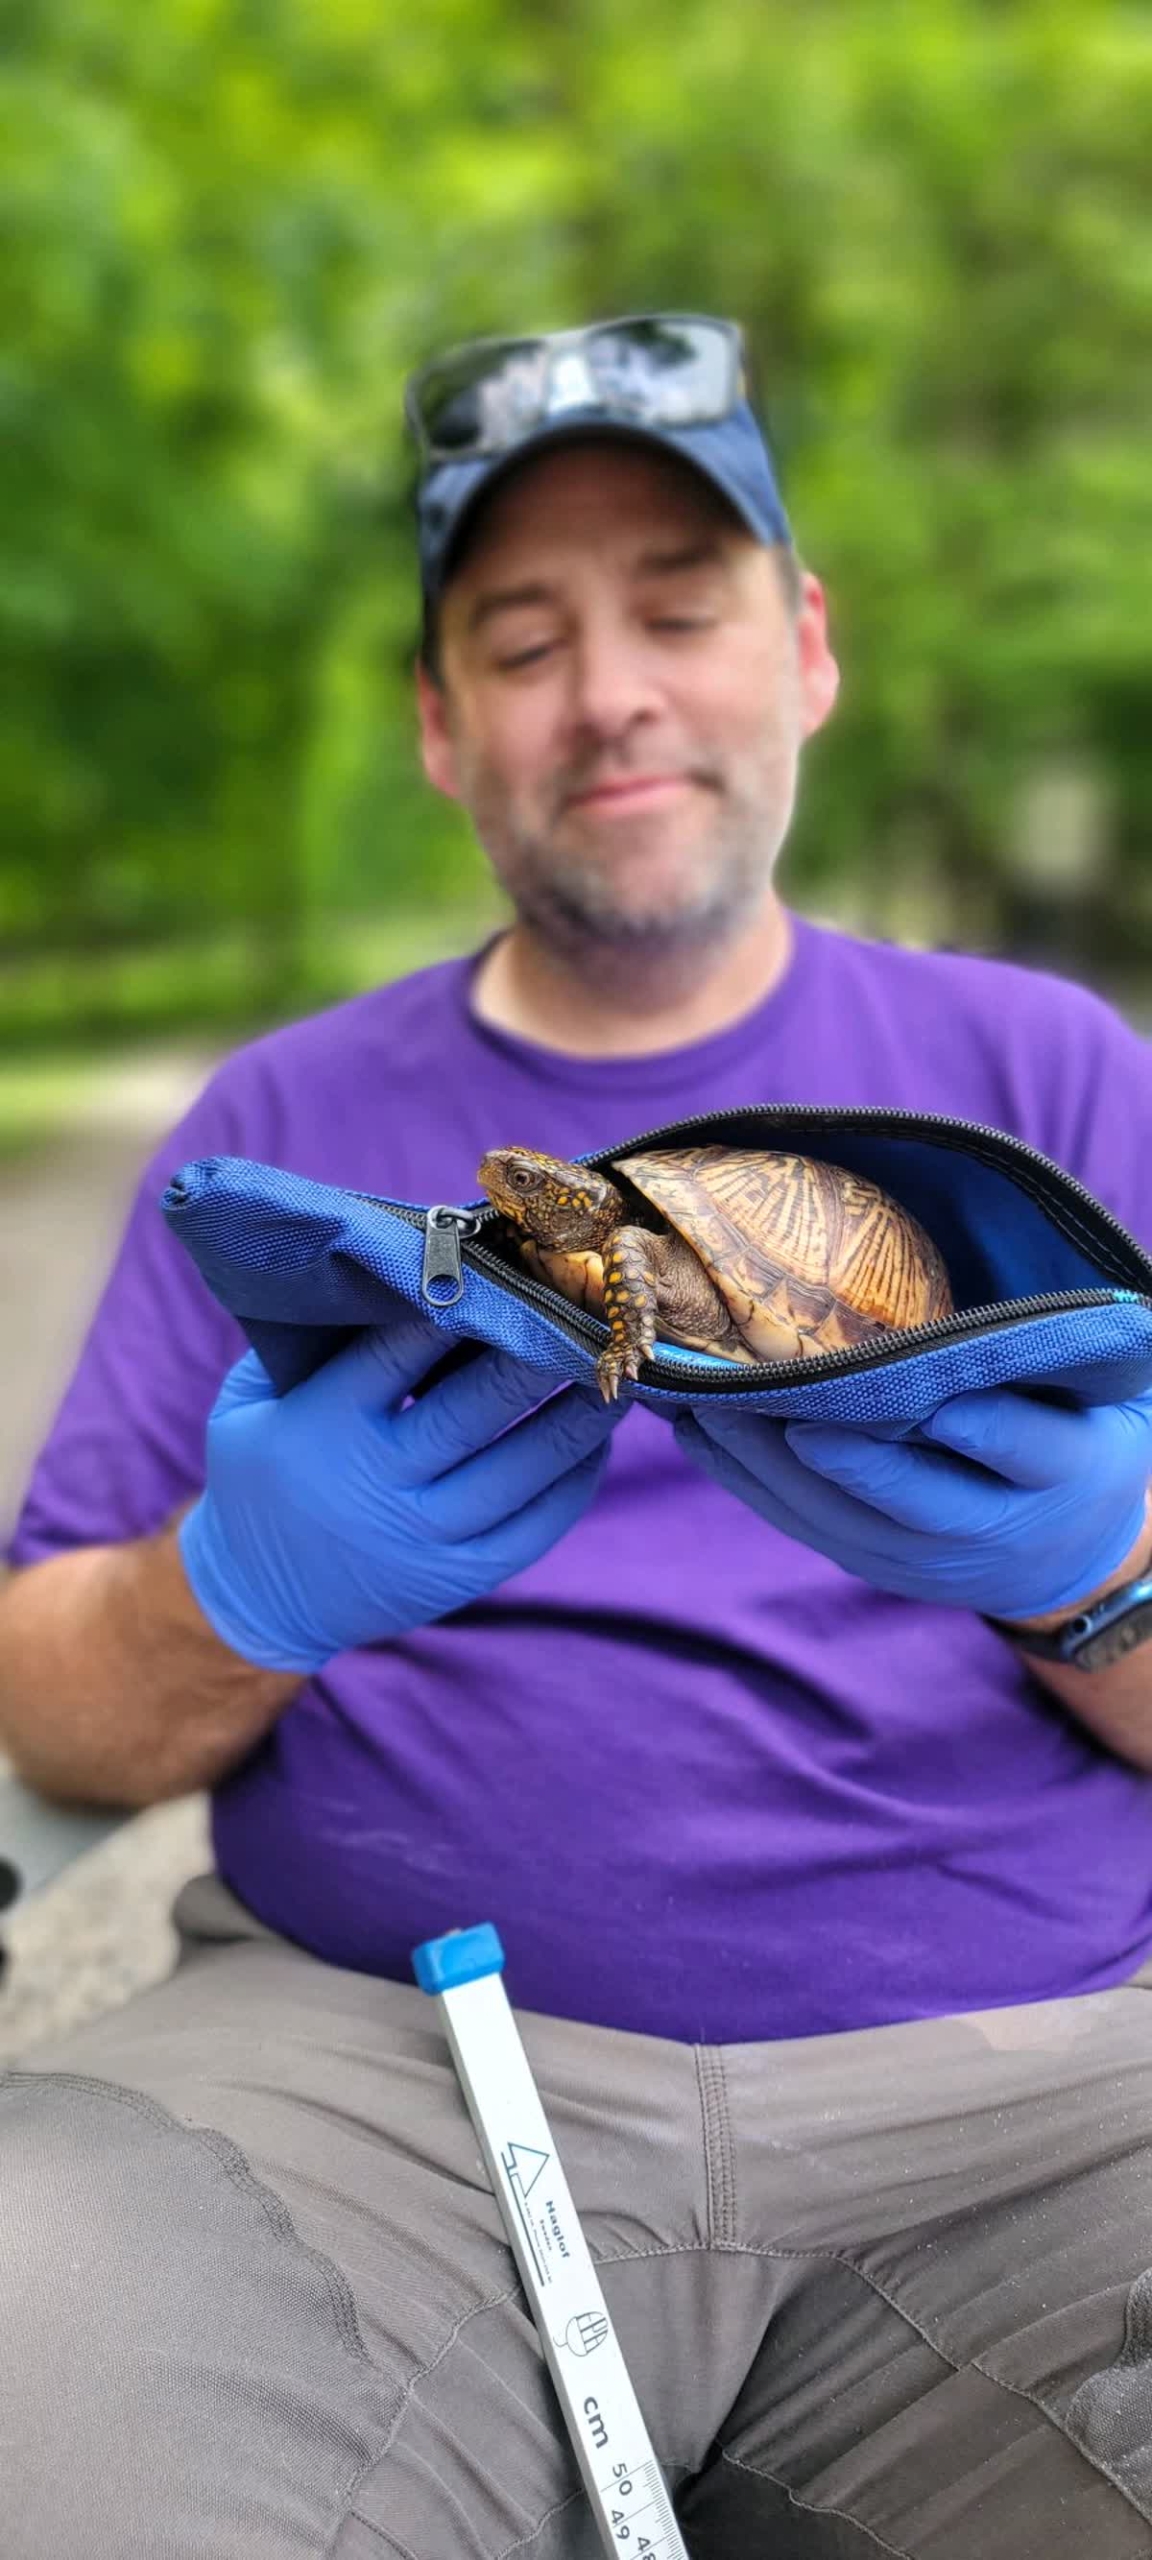
Step 9: The Turtle Photo Shoot
Before our turtle heads home, it gets a quick photo session.
We photograph the carapace, plastron, and sometimes their face to create a permanent visual record. These images document shell condition, injuries, markings, and other characteristics that may change over time.
Photographs are often invaluable years later when researchers review old records or compare changes in individuals across multiple captures.
Plus, let’s be honest—box turtles are pretty photogenic.
Step 10: Going Home
After all samples have been collected and all measurements have been recorded, it’s time for the best part of the day.
Release.
The turtle is returned to the exact location where it was found, and the release time is documented. Returning turtles to their original capture site helps minimize disturbance and allows them to continue their normal daily activities.
Within moments, many turtles disappear back into the vegetation as if they were never there at all.
Except now, thanks to the information they provided, we know a little bit more about their population, their health, and the challenges they face in the wild.
Why It Matters
A turtle workup may only take a short amount of time, but the data collected can support years of research.
From blood analyses and disease surveillance to population monitoring and conservation planning, every turtle contributes valuable information that helps scientists better understand and protect these remarkable animals.
So the next time you see a photo of a field team holding a box turtle, remember:
Finding the turtle is only the beginning.
The real science starts after we say, “TURTLE!!!”