
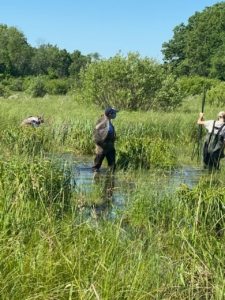
Setting up some traps.
Hello readers, welcome back to your weekly dose of fieldwork propaganda. Last week was relatively slow for us, and yet somehow our blogpost was still up late. Despite Michelle voluntarily eating one of the raw sardines we use as bait in our turtle traps (as an offering to the turtle gods) we caught few turtles. So this blog post we decided to walk you through the average “turtle work up”.
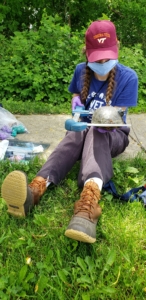
Michelle measuring the carapace.
Imagine you have sloshed about 30 meters through waist deep swamp, you arrive where the GPS coordinates say your trap is, then you find where the trap actually is, lift up the rings, and behold within it lies a mighty Blanding’s turtle. One of the first things we do with the turtles we catch is look for markings that indicate the turtle has been captured before. This can be rather obvious if it is a turtle with a radio transmitter attached to their shell, or more subtle in the form of a notch code. To read a turtle’s notch code you count their marginal scutes along the left and right sides of their shells and note which scutes have a small triangular notch in them. Therefore if a turtle had a notch in their 3rd marginal scute on the right side, and the fourth marginal scute on their left side, their notch code would be 03L-04R.
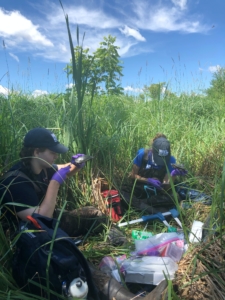
Processing some painted turtles in our grassy nest.
Once you have identified your turtle or decided it will be receiving identification if it is a new capture, you need to set up your “clinic”. This consists of a sharps container, a kit with collection tubes, blood draw supplies, a scale, gloves, etc. Usually we’ll carry the turtle to dry land and sit down in the grass, but we have also processed turtles while standing in the water using floating mats of grass to hold things. We start off with a basic physical exam of the turtle. We assess physical condition, get a weight, and take measurements of the shell and carapace. Once we have fully assessed the turtle we also take a blood sample as well as oral-cloacal swabs and shell swabs.
Alexis settling into her swampy “clinic”.
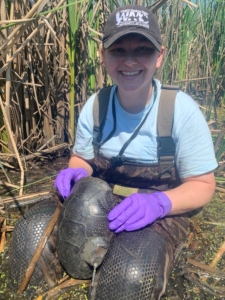
Drawing blood and obtaining oral swabs can require a lot of patience with some of our feistier turtles. When needed we use restraint techniques like “placing the turtle between our knees”, or “lightly holding the turtle in place with a foot”. It is important to go slow with the turtles. Moving too quickly or trying to use too much force can end up hurting a turtle so we are always careful to put the animal’s safety first. As we process turtles we are always taking notes on our phones and each turtle gets a file with pictures of their face, carapace, and plastron. Once we’ve collected all the information and given the turtle a new notch code if needed, the turtle is ready to be released back to the wild. We usually try to set them down close to where we found them and watch as they majestically scuttle back under water.