Did you know? An owl can rotate their necks 270 degrees!
Here you can make your own owl puppet!
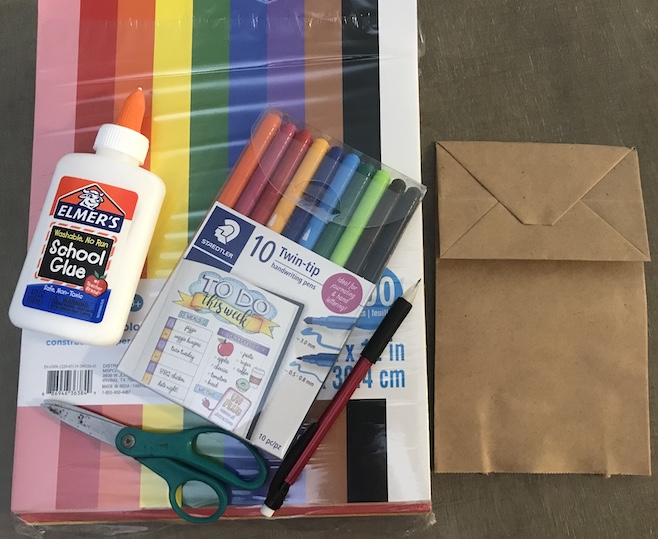
Supplies: (insert photo of owl supplies)
- Construction paper
- Pens/pencils/markers
- A small paper bag
- Glue
- Scissors
Step 1:
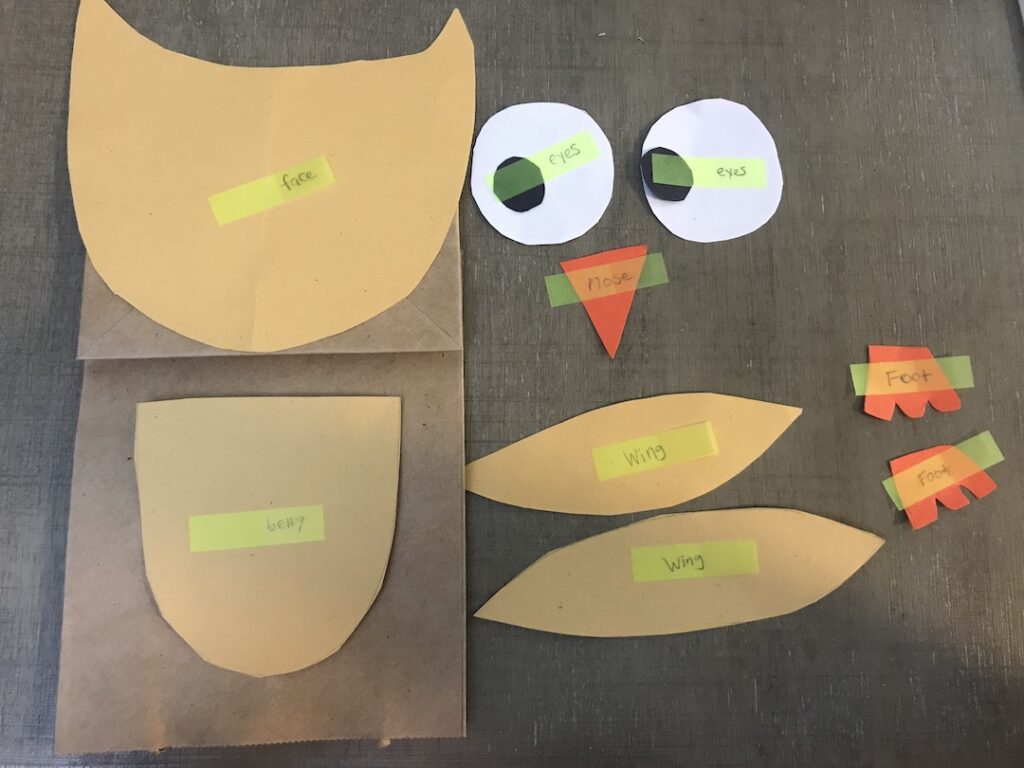
Using construction paper, draw and cut out the following:
- 2 sets of circles (for the inner and outer circles of the eyes)
- A triangle for the nose
- 2 feet with claws
- 2 large ovals for the wings
- Half a circle or oval for the shape of the belly
- The face of the owl
The image shown above has labeled what each shape is for to help you visualize what they look like.
Step 2:
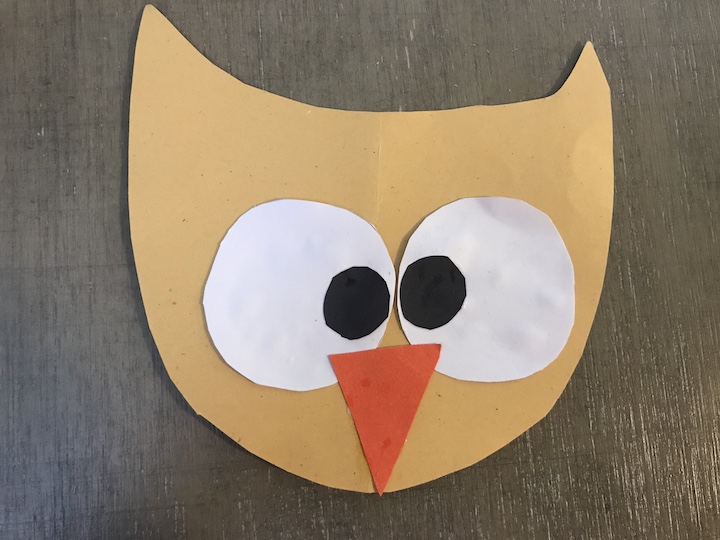
Glue the small circles to the larger circles to create the eyes for your owl. Then glue the eyes and nose onto the owl’s face.
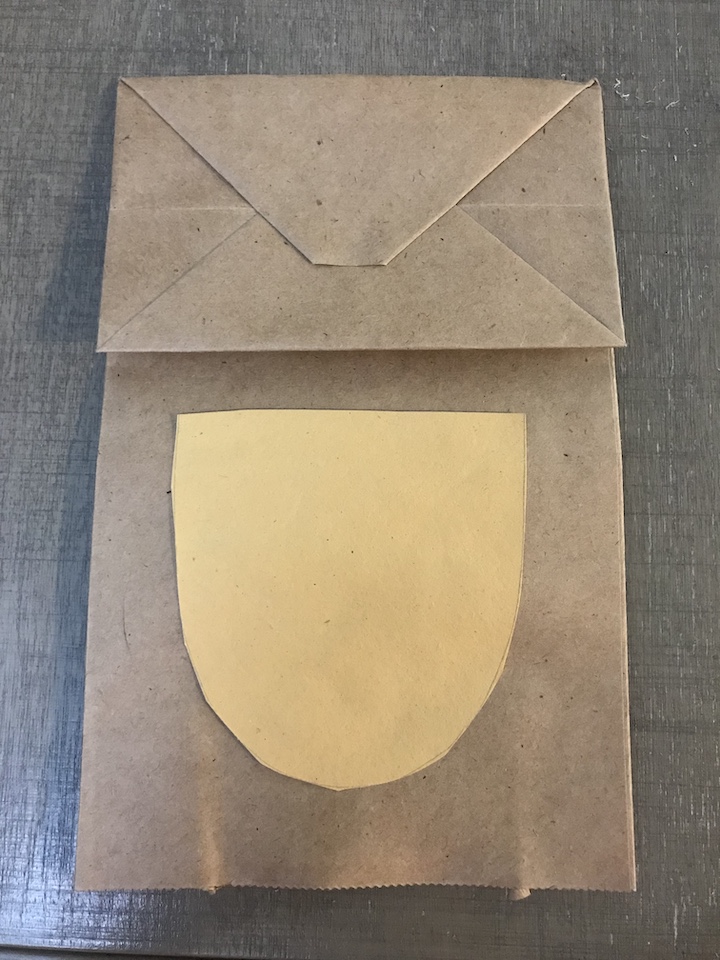
Step 3:
With the opening of the paper bag facing you, Glue the half circle/oval shape of the belly onto the center of the bag.
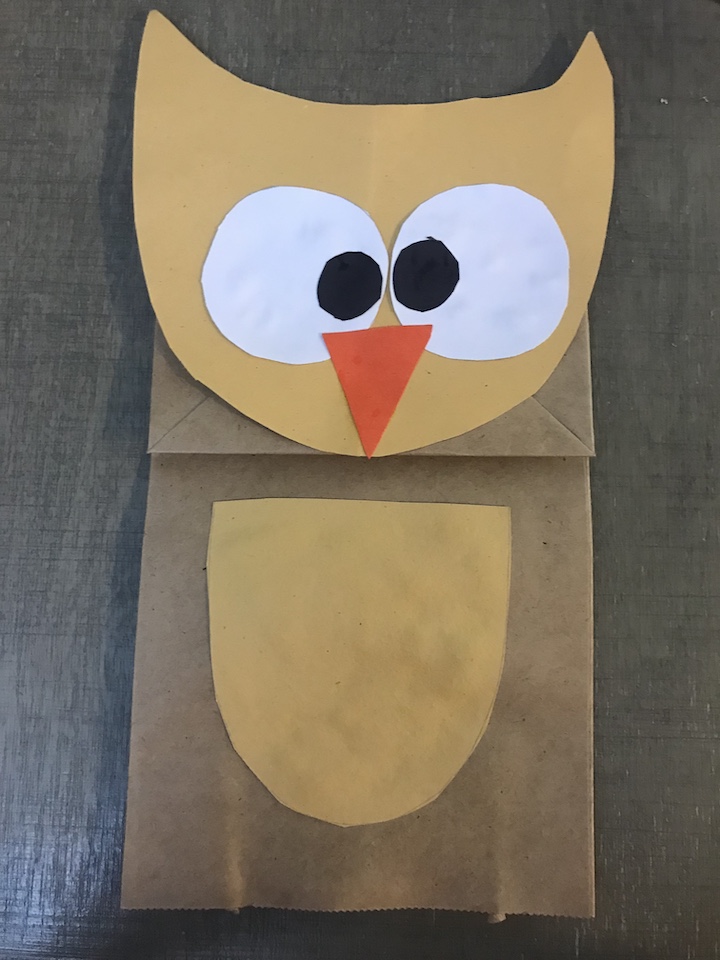
Step 4: (insert photo of head on bag)
The bottom of the paper bag will be the location of your owl’s head. Glue the owl face created in step 2 to the bottom of the paper bag. This will allow you to stick your hand into the bag and use the folded-over bottom portion to move your puppet.
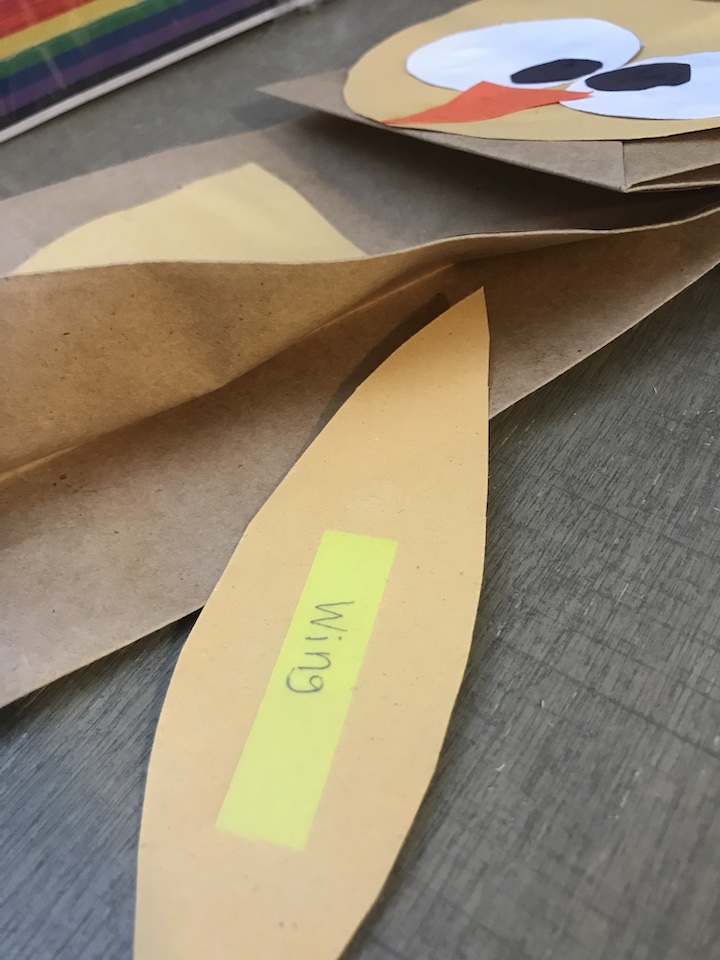
Step 5:
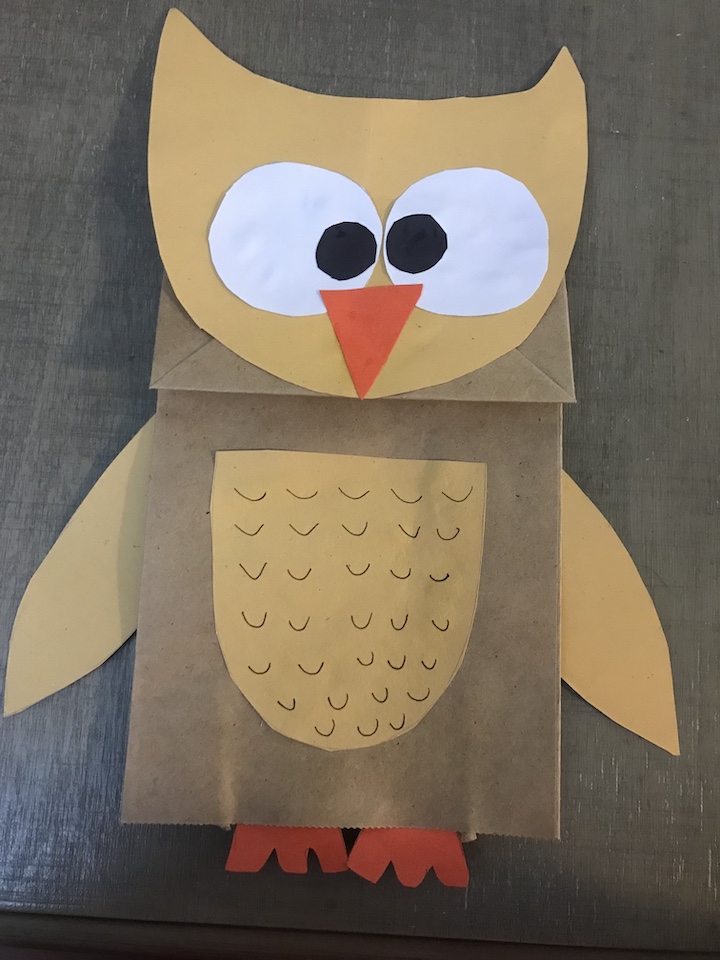
Apply glue to the top 0.5 inch of your wing cut out. In the current positioning of the bag, the side of the paper bag has an upper and lower layer. Attach your wing to the upper layer, as shown in the photo above. Repeat the process for the other wing on the other side of your owl.
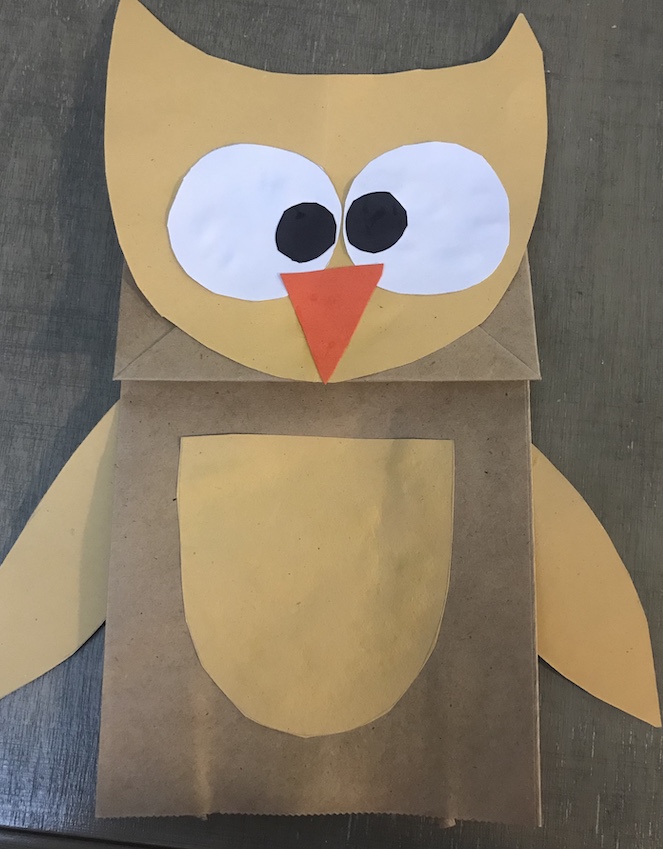
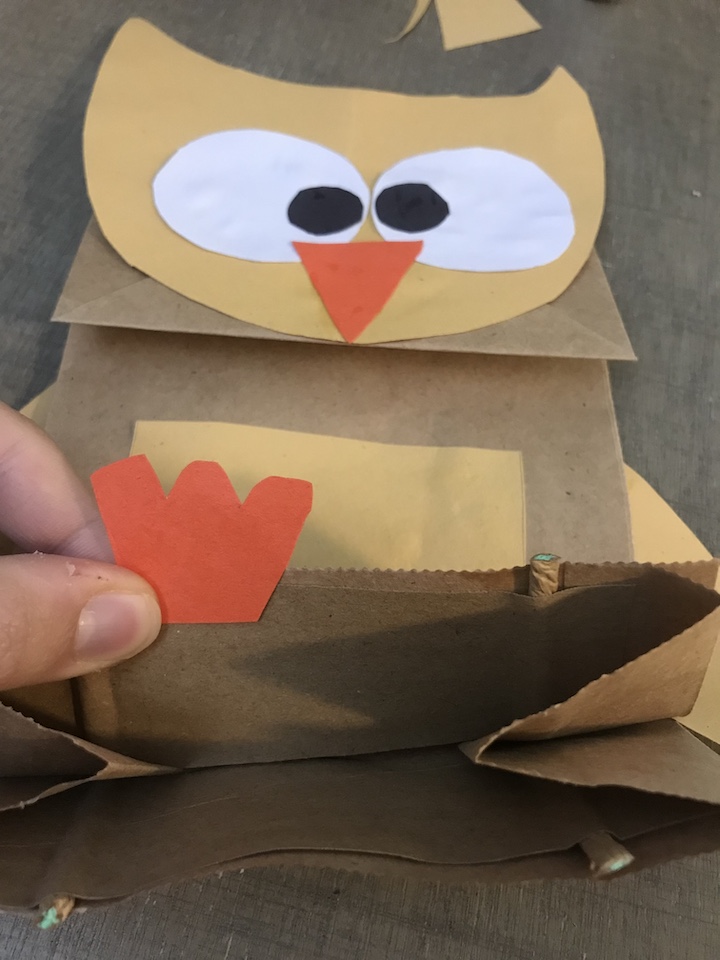
Step 6:
Apply a single line of glue to the very top of your owl feet. Attach feet to the inside of the paper bag, as shown in the photo above. Allow some of the feet to be visible from the front of the puppet.
Step 7:
Use markers or crayons to continue to decorate your owl how you would like. Once the glue has dried, have fun playing with your new owl puppet!